Tuesday, March 24, 2015

Snowy Days and Sandy beaches, Walt Disney World and The Wonderful Wizarding world of HP: one helluva Road Trip!

A week ago, I was back home with a bagful of laundry and a smile on my face. Holidays do that to me, specially good  great ones.

With wonky weather in Dallas ( as high as 75 a day and dropping to 30s the next and a snow shower to follow through) we were looking forward to the school Spring Break.

Plus, we had PLANS.
We planned an early birthday gift for Li'll S. We had plans to take him to Florida and go to Walt Disney World and Universal Studios ( well, that was mostly because I have an obsession with Harry Potter).

Now a trip to WDW and Universal studios needs a good deal of planning. I am just listing what I did and what worked for me. These are just tips. I may have forgotten some, but if there are questions, leave a comment or email me and I shall answer them as best I can.

I have read that people plan their WDW holidays a year in advance! Not possible in my case, we plan our holidays when M gets his leave worked out in office. 
We decided to do a road trip. About 1200 miles one way. This was the longest road trip for us and we knew we wanted to do this. 
We love our road trips, passing through different states and various cities.
The other option is to take a flight, quicker and convenient if you have small children.

We started Friday evening and reached Orlando on Saturday night. 
For the journey, this time, I stocked up on small snack portions and packed them in a small plastic caddy ( from Dollar Tree) 
Pic source: Google search
This helped me stock small snacks ( fruit cups, chips, milk tetra pack, juice, cookies, string cheese etc) and give them to S and for entertainment we had his portable DVD player and some movies, coloring books, craft activity set (ex: Minecraft).

Pic source: Google search


We bought tickets in Orlando. But if you have time and have planned the visit well in advance you can scout around for deals on tickets ( visit undercovertourist.com for ticket or tickets+hotel deals).
Sign up on Mousesavers.com for tips and tricks for WDW.
These are just suggestions, I am not advertising anything, no profit.

Get the Disney App on your smart phone. This allows you to add all people in the family under your account and you can get your FastPass+ as well as check wait times (more on that later).
You can get the Universal app too. 

We got a buy 2 days and get the third free at Universal Studio (we opted for a park-to-park ticket so as to go between the two Harry Potter themed parks) and a 3 day ticket for WDW.
This may seem excessive, but it worked very well for us.

We started our holiday with Universal Studios.
The trick is to reach the park well in time, that means early. Some people will go up to 30 mins early, so as to be the first inside. We went well in time, but not as early as the park opened. 
Luckily our hotel was close to the park and it did not take us long to reach.

One tip: please carry a stroller for your child (my son is 6 and I carried an umbrella stroller, the best $15 I spent). There is a LOT of walking to be done in the parks and it's tough on the little ones. Better ferry them around than have them cranky by mid-day and whining, dragging their feet or realizing that buying the stroller was better than renting it for $15 daily. Plus it comes handy in dumping the camera bag, water bottles you will be carrying.

I carried chilled bottles of water, small juice tetra packs, some dry snacks. The parks have expensive food and while eating out cannot be completely ruled out, you can cut down on it.

We went to Island of Adventure first ( the village of Hogsmeade), I have some pictures to share with you. 


The village is right from the sets of the movie or in my case, just as I had imagined it when reading the books. Potterheads will agree with me here, the world changes around you as you step into Hogsmeade, those who (like me) are die hard fans are easily distinguishable from the Muggles roaming the streets, liking everything, but not really understanding anything.
For example, in the simulated ride ( which is FANTASTIC, I might add) without spoiling your fun, when the dementor rises up, muggles are screaming 'Aarrgh' or 'eeeeeeeeeeeeee' or similar, and I was screaming 'Expecto Patronum'.... 
Don't just shake your head at me, feel the excitement!

The train ( the Hogwarts Express runs between Hogsmeade to Kings Cross) is right at the entrance. Walk into the stores selling (very expensive) HP themed goods. Ollivander's has a small demo, which is fun ( the wand chooses the wizard) after the demo, you can go buy a wand ( choose from character wands, prices ranging from $35 and up). Dervish and Banges has the monster book of Monsters on display, which displays its monstrosity every few minutes. S stood in front growling and pulling faces at the book and thought it was responding to him (LOL!)

Drink up on cold Butterbeer (the liquid form, not the frozen) or a Gilly water or Pumpkin Juice (I liked the bottle but the actual juice, not so much). Walk into Honeydukes and drool over familiar names like 'Bertie Botts every flavored beans' or ' Chocolate Frogs', 'Peppermint Toads' ( that is just regular candy in fancy packaging).


The other rides are fun too ( the Hippogriff ride is a small roller coaster, kids enjoy it too) There is another roller coaster ride, which was a bit too much for us and we skipped it. Walk thru Hogwarts castle (for the ride) and listen to the portraits talking to one another as you walk by.
There are lockers (free for upto 2 hours ) to keep your valuables in when you go or the HP ride.

The other rides in US are so much fun too. My son loved the Minion ride, we did too!  

The Spider man Simulated ride is awesome too.
The other stuff, I don't remember much, I was too dazed by the HP world visit. 

Our second visit to Universal studios was to Diagon Alley.
Absolutely fantastic! I loved loved everything here! 
Walk past Kings Cross Station, to the Telephone Booth, get in and dial 62442 to hear a message  from the Ministry of Magic. Stroll towards the Knight Bus and meet 'Stan Shunpike' ( Simon, actually) and chat with him and also hear the 'shrunken head' talk back. 
Knock on No. 13 Grimmauld Place and catch Kreacher peeking out at you from upstairs.


As you walk into Diagon Alley prepare yourself for Harry Potter everything! Even Knockturn Alley. It's dark and dingy and creepy. Walk into Borgin and Burkes to look at all the dark artifacts (the Hand of Glory, the Emerald Necklace which has claimed the lives of 19 muggles to date, Malfoy's Death Eater Mask etc) 
The biggest attractions are Weasley's Wizarding Wheezes. The shop is very colorful  and just what you would expect a shop owned by Fred and George to be! I could not stop grinning as I looked at all the stuff they had. The Skiving Snackboxes, The Puking Pastilles, the U-No-Poo( bwahahahahaha!!) M & M's and the Pygmy Puffs, the Dolores Umbridge doll ( there is a bigger version is  cycling from one end to the other ( just glance up) on a tight rope. There is Flourish and Blotts ( with Gilderoy Lockhart smiling at you in the picture frame), Madam Malkins displaying Hermione's gown ( Goblet of Fire) Florean Fortescu's Ice cream parlour.
And then you come to Gringotts! Where the Dragon is sitting atop the roof, snarling (he spouts flames every 20 minutes or so) and go indoors for the ride which is mind-blowing!


Striking off from Diagon alley to the right you can walk in the back to get refreshments and also hear Celestina Warbeck singing. There is a Mermaid fountain that spits at you ( I am not sure, but it has to do with buying a special wand that is programmed to trigger that action, upon saying the spell and waving the wand in the correct manner. There is also an umbrella soldered to an awning, which works the same way)..There's Gregorovitch's shop, selling wands. Take a ride in the Hogwarts Express ( pass thru the barrier to platform 9 3/4 , walk past the 'mirror' contraption and it looks like you are walking through the brick wall) and take the short ride on the school train with all the thrills ( scenes from the book / movie flash past)

Oh and there are other rides too, outside, The Transformers ride, Simpsons ride, MIB , Mummy ride all are wonderful and a must do.
We found our visit to Universal Studios very enjoyable, far less stressful than our visit to WDW. Shocked! I know, but it is true. The waiting lines are not too bad, the lines are covered and fans circulate making it not too bad) and they have small concession stands , while you wait in line. Smart marketing!

We spent 3 days in Walt Disney World, the first day was in Magic Kingdom, where we had booked 3 Fast Pass+ and the remaining rides had to be done waiting in long, long lines. Choose your Fast Pass+ well.Once you have exhausted the 3 FP+, you can go to a FP+ Kiosk and get an additional pass. By the way, you can book ( if you have planned and bought the tickets and made bookings ) you FP+ upto 6 months in advance or the night before, the only risk being, the night before may not give you the options you want. You can also get Magic Bands ( for an additional $13 or so) which you just need to touch and gain access  for rides FP+, or in restaurants- so it goes to your account.

There are 4 parks: Magical Kingdom, Animal Kingdom, Hollywood Studios and Epcot.
We chose to to go MK, AK and HS.
There are Disney themed resorts to live within the park area and that has it's advantages  ( free shuttle, extra hours etc..), but getting a reasonable rate at the last minute is impossible. If you want to stay in a themed resort, plan well in advance. 
It isn't a cheap vacation, I can assure you of that! But it IS so much fun! 
Just make sure you plan and budget for all things.

We also chose to live outside the park. 
Our hotel ( like most, I believe) had a shuttle to take us to and bring us back from the park.


A small walk from the transport center leads to either the monorail or the ferry to the Magic Kingdom ( from where you go in or to  the bus lot to take you to other parks).

The main thing to remember in WDW is to take things easily, you are there to have fun, don't get worked up about that! 

Get to the park well in time ( again, people here  go upto 45-60 mins before the park opens to be the first in, we did not, we reached  in time and it was still crazy crowded) and make sure to carry chilled water bottles ( or pay $2.50 /$2.75 per bottle) and some snacks.

Don't rush about from ride-to-ride, line-to-line. Make sure you rest ( go to the quiet rides like the People Mover in Tomorrowland, Carousel of Progress for example where you are entertained and rested).

There are lines to meet and greet the characters ( take an autograph book if your child is a big fan). I have no idea about the princess greeting time ( the son does not care one hoot, except for crooning 'let it go...'- a boy version, yes! there is one and you will read about it here, later) 
Wear a lanyard with Disney Trading Pins and trade them with the staff there who will trade them happily. Let your child pick the pin they like and trade. The pins are rather expensive, about $6.50 per pin, or you can order them in a small or large lot on Amazon ( cheaper, but no choice of pins, you get a mixed lot of big and small and some not too popular characters).

Some very popular rides have long wait lines, be prepared, your child is bound to get cranky unless you have a FastPass+, keep something handy to keep him / her entertained ( popular choices, iPhone, a book- the wait is anything from 45-110 + mins) and hydrated.

Some very popular ( do not miss)  rides are: (in Magic Kingdom)

The 7 Dwarfs Mine Train Ride
Big Thunder Mountain Railroad
Space Mountain
Splash Mountain ( wet ride, carry an extra set of clothes)
Pirates of the Caribbean ( the ride was under maintenance when we were there) 

To relax and recover, go in for the Enchanted Tiki Room show, it's a small show with stuffed birds who have a song routine sitting on their perches. It feels a bit lame after the excitement of the rides. But (shrug) okay to relax.
We missed a few rides, it was a little overwhelming and felt no need to overdo something and get nauseated on day 1 of WDW. 

Then there are the parades. We missed the afternoon parade as we were in line ( I have seen the character parade in the California DisneyLand and its a fine one!) but got the Electric Parade at night. 
Then there is the 'Celebrate the Magic' show, after the Electric Parade, when ... how shall I describe it!?... when animations flit across the castle (check pictures in the second row below)with the songs playing, it is be-au-ti-ful!  And now we come to the Frozen, Let it go, 6 year old 'boy' version..."let it go, let it go... let the toilet overflow..." I heard S humming it as the castle lit up with Elsa's face. 

The firework display was fantastic. The grand finale. 
The day is VERY long, so be prepared for aching feet, tired body, a happy heart and your will to drop into bed as is, without shower, but the hot water hits your sore body and you forget all that and relax and relive the day in your mind, all over again and plan the next Disney park Adventure!

Our favorite rides in Hollywood Studios were:

The Hotel of Terror
Rock N Roller Coaster
Starwars

The rides are thrilling and we wondered for a minute if Li'll S would go on them, well, he did and loved them! 
The  Tower of Terror is a lift / elevator that takes you up and bounces you up and down like a yo-yo. The rock n roller coaster is a high speed and LOUD rock music blaring ride that shoots at high speed and tumbles and turns you upside down. Thoroughly enjoyable. The loud music  made me swallow a headache relief pill, but totally worth it! 

Apart from the rides, we also met the Disney Stars, Mickey Mouse, Goofy and the rest. 
There was the fabulous Cinderella Carriage, all golden and intricate, but I could not get one clear shot at it, the girls just would not stop pouring in the line and posing, once this way, once the other, blowing kisses.... hummph! Color me Grumpy! 

This park can be covered easily and we went back in time to catch a fairly early ( 8:30 pm) shuttle back to the hotel, enjoy dinner and hit the sack.

The last Park was Animal Kingdom

Our favorite rides were:

Expedition Everest
Kali River Rapids
Primeval Whirl
Dino ride ( cannot remember the exact name)
Kilimanjaro Safari ( bumpy ride) 

Walk thru the Animal Kingdom and experience Asia, Africa displays. I was a little perturbed that everything from India was displayed as old, worn and dated.... in ruins. All of it.
There is also a bug habitat, which we did not explore.
Kids can become wilderness explorers and carry a sticker book around looking for  whatever is mentioned in the book and earn badges. 
Again, a park that can easily be covered in the day without too much stress. I carried an extra set of clothes for S. Wet clothes are no fun! There are lockers available ( free for about an hour ) when you go on the ride. 

We left Orlando happy and content.
Our next stop was Destin Beach. We woke up to this glorious view and went to the beach. It was the happiest of days. We did not want to leave. It reminded us of the years we spent in Los Angeles, We lived just a couple of miles away from the beach.
So beautiful! The sea, so alluring. It was perfect! 
Our last stop, on the way back was in New Orleans, we made a short stop of 2-3 hours and visited the French Quarter. It was brilliant! People were in the mood to celebrate the weekend. St. Patricks day was around the corner and people were sporting green everywhere. It was so unlike the wide and uncrowded streets of Dallas! VERY charming! The sidewalk cafes, the live music......dancing in the street! S joined in it all too.
There were horse drawn carriages, quaint shops with colorful wares and  a wedding procession can block the narrow streets and it was considered ok! 
And a visit to the French Quarters is incomplete without walking into Cafe Du Monde where everyone heads for Beignets and coffee. I had Cafe Au Lait and it was the best I have tasted in ever so long! 
 We thoroughly enjoyed the little time we had there!

 
 From here:

 To:


 It was one AMAZING road trip! 

Pin It

Wednesday, February 18, 2015

Khandeshi Pithla

And so it happened again. Sigh!
My tendinitis is back. Every time I use my right hand (which is ALL the time) I get shooting pain and I feel immobilized for a minute.
The pain subsides and I try again, it hurts. And so it has been going on for a few days now. I decided to take it easy.
Making fulkas was out of the question, so I got some Wheat Tortillas from Kroger to use instead.
( I am not advertising here, merely sharing my experience with you all ) a few months ago, my friend Samta, introduced me to these tortillas and I was surprised that they worked so well as a substitute for fulkas. All it needs is a grill to set atop the stove and high heat, just roast them and smear with ghee and you are set.
I find these very convenient to use when in trouble like now or even on days I cannot make any at home. 

I am also very lucky, I have friends who pitch in and help.
My friend, Tanu, made and sent over some choley and sheera, that took care of our dinner and M's lunchbox and I got invited to lunch at her place, the next day. 
This was one invitation I did not turn down. Tanu and I, apart from being good friends, share quite a few things in common, we both like good food, we both love a good laugh. This makes for a very good combination and we look forward to eating, laughing and sharing recipes.
Our cooking styles are pretty similar too and that makes us very comfortable and confident of what is being served.

Maharashtrian food

So when I rang her doorbell today, I knew what she was making, however, I was not prepared to be dazzled by the taste of her version of 'Khandeshi Pithla' a recipe passed on to her by her Mother-in-law.
Now pithla is typically the poor man's food and is paired with bhakri (a gluten free and fat free skillet flat bread). This classic combination is comfort food to most Maharashtrians. In the USA, it is a big deal! Making bhakri requires skill, patience and believe it or not, luck. If you are lucky, you will get fresh flour ( Jowar, in this case). So you can imagine my delight and eager anticipation!

The bhakri making began in earnest, with a warning not to expect something wonderful,which was quite unnecessary.  In the meantime, I checked the Pithla and stirred it around, letting the aroma whet my appetite. I knew then, this was a wonderful recipe and I had to blog about it. 

As I broke off piece after piece of the bhakri and scooped up pithla and ate, I realized that this recipe was a bit different than what was made in my home, Tanu explained that this was the 'Khandeshi' style.
And in between her explanation and my eager shoveling the fire alarm went off like a banshee, scaring us out of our wits. We ran around like squawking chickens, grabbing a towel here or a t-shirt there and flapping away at the alarm and switching on the fans and opening doors letting in the cold breeze.
It almost became a routine, talk and eat, run around flapping some odd garment to make the pealing alarm stop, rinse....repeat...
But overall, a great meal packed with the usual dose of fun and laughter and a common love of good food.


To make pithla , you need,

2/3 (scant) cup Besan ( chickpea flour)
1 medium Onion, finely chopped
3-4 green chilies ( +\- depending on how much heat you can tolerate)
A few curry leaves
3 cloves of Garlic
2 tbsp Oil
1 tsp Mustard seeds
1 tsp Cumin seeds
1 tsp Turmeric powder
1/4 tsp Kashmiri red chilies powder ( just to enhance the color) - optional
1/2 tsp Asafetida powder
Salt to taste
2-3 tbsp Fresh Fenugreek ( Methi) chopped  or 1 tbsp Kasuri Methi
Warm water ( thrice the quantity of besan)
Cilantro  to garnish

In a mortar and pestle, crush the garlic and green chilies or pulse them in a mixer/ blender to a rough paste. Heat oil in a pan. Add the mustard seeds. As they pop, add cumin. As the cumin sizzles, add the asafetida followed by garlic-chilies paste. Saute briefly (so the raw smell goes away) and then add onions and cook till done. Add curry leaves, turmeric, salt and red chilies powder, if using. Add the besan and mix well to incorporate all the spices into the besan and roast the besan till it smells nutty.
The color will change to a warmer shade. Ensure that you roast besan on medium heat.
Once the raw smell of besan is replaced by a nutty spicy aroma, add the fresh or Kasuri Methi and mix well.
Now slowly add the warm water while constantly stirring the besan mix. Break any lumps that have formed and stir to make an even pasty gravy.
As it cooks, the gravy will lose the pasty look and will be replaced by a deeper shade and a glossy look. Taste and check salt, adjust if necessary.  Cook for 3-4 minutes stirring at regular intervals.
Switch off the heat, cover and let the flavors mingle for 10 minutes.
Garnish with cilantro and serve with bhakri or even white rice.
If you like, serve finely chopped onion alongside.


NOTES:
-The above proportion will make plenty of pithla, will serve 4 really hungry adults.

- Be sure to roast the besan well, that lends a wonderful depth of flavor

- The longer the pithla sits ( or in case of leftovers) the heat quotient goes up, so make sure to add green chilies judiciously

- The besan will soak up the water and make the pithla dry and thick.

Pin It

Sunday, February 08, 2015

A Bake Sale Adventure

As the new year rolled in, I promised myself, I will blog.
The days passed, I kept reminding myself, but I did not follow through.
I made excuses, I'm tired. Parents were visiting, I wanted to spend time with them and cooking for them.
Then came the annual 'Sankranta Mela', li'll S was in a dance group and I had booked a stall for myself at the 'Anand Bazaar' (food stalls).
Drawing courage from my previous experience, I jumped right in, this year. 

I got busy with dance practices and homework and squeezing in as much time as possible for other activities.

And so, finally, I am back with pictures of my Cupcake stall. The cupcakes sold out and I couldn't be happier. 
M and li'll S were my helpers ( S being the main helper and cashier, a job he loves!) 

I made egg less Vanilla and Chocolate cupcakes and made butter-cream frosting.

These pretty hydrangeas were a hit with the girls.

Hydrangeas

Who doesn't love a Minion?
These were sold out within minutes! I wish I had made more.
I got this idea from Pinterest.
Here's how you make the Minion cupcakes
1 box Twinkies 
Cupcakes 
Butter cream frosting ( dyed Blue)
Smarties / White chocolate chips / Mini marshmallows (for the eyes)
Black frosting
Chocolate sprinkles for the 'hair'
Place the Twinkies in the fridge for about 15-20 minutes.
Frost the cupcakes ( I used the basic round tip to put the frosting on)
If you plan on using marshmallows for the eyes, prep them. Apply a thin coat of oil to kitchen scissors and gently cut the marshmallow into 3-4 rounds.
I used White chocolate chips, they were the right size and I just poked the pointed end into the Twinkies.
Pull the Twinkies out of the fridge, slice them in half.
Poke one or two chocolate chips in the 'head' part. If you are using marshmallow, put a tiny spot of frosting on the underside of the marshmallow and stick it on, do the same ( spot of frosting) fro Smarties.
Pipe on glasses  and smiles using black frosting. I used Wilton's ready to use tube, it was a mistake.
Poke chocolate sprinkles for hair.
Gently place the decorated Twinkies on the frosted cupcakes. Ta-Dah!  Minion cupcakes are ready!
The most popular cakes, Minions.
I made these flower cupcakes using the 'leaf' tip. These were also a hit with all the kids.
Flowers
This anti-gravity cake was a last minute thought. I made it towards the end and this is the only picture I have of it, an unfinished one.
I found this tutorial very useful.
The children marveled at the cake and wondered if  the M&M's would keep pouring out. Some of them, out of curiosity also tried to pluck the bag out and see how I made it happen.
Anti-gravity cake


In all the hurry of the dance performance and the baking, I did not carry my camera at all, but that's when friends chip in! 
One of the Mom's in the dance group stepped forward and clicked these wonderful pictures and has shared them with me. Thank you, Vaishali! The pictures are great! 

I'll leave you all now, with all this sweetness. See you soon. Hope you all have a great week ahead.

Pin It

Friday, December 19, 2014

DIY Gifts, spread the cheer!

It's that time of the year! Tomorrow the schools will break for Christmas holidays and there is a general air of festivity in the air. 

We have a small tree and it's up. The child is expecting a ton of toys and has so far forgotten to write to Santa for it, despite my gentle reminders. Oh well! Santa has to give what he feels like. 

It's fun to see Li'll S as excited about Christmas as he is about Diwali, of course the main excitement is the gifts part, the getting , not the giving. We need to sit down and explain that part to him one day. 
I did some DIY for the Christmas Teachers Gifts. I really enjoyed the planning, shopping, making and assembling part. 
I have never been the craftsy person, I well remember how I have suffered ( as have my parents) when completing craft homework / projects in school. I used to get help from all quarters just to finish that task. 
We had embroidery ( basic stitches) and knitting in school. The pillowcase I was trying to embroider was a real pain, I mean 'real pain' I pricked my finger several times, I was 'punctured'. The thread avoided the eye of the needle like plague and in the end, I gave up and got someone else to do it for me. Knitting was another hurdle, the clicking foot long needles were fun initially but the knit /purl had me twisted, luckily my Mom was an expert and soon corrected all my mistakes ( it seemed almost as if I was doing the exact opposite of what was written) and I had a sweater, booties and cap set for an infant. I kept it safe all these years and my son wore it first!

Whoa! I'm rambling.. Pardon me. We were talking of DIY and the gifts I made.
This year, I made a small hamper for the teachers and I sincerely hope they like it.

The idea of a 'spa in a jar' struck a chord in me. I have one child and he can shred my nerves. Don't get me wrong, I love my little fella to bits, but there are times I wistfully dream of a remote control which I wish a Mom had, just to sometimes hit the mute button or sleep mode! 
Imagine how stressful it must be to handle 20 such energetic kids, all with different temperaments. With that idea in mind, I made this.

Spa in a Jar ( a loofah, nail polish remover pads (yellow round case), 2 shades of sparkly nail polish, a chap stick and some chocolates)
The Spa in a Jar is customizable, add what you like. Maybe a moisturizing lotion, or a lipstick, manicure set, face mask... I refrained from those as I had no idea what the brand preference is.
I found these chalkboard stickers which I used on the jars and wrote 'Relax' on them. 

The second Jar was Hot chocolate mix, a favorite during this season. 

There are many sources of hot chocolate recipes all over the net. 
I made mine like this:

3 cups Non-fat Milk Powder
2 Cups powdered Sugar
1 1/2 cup White chocolate chips
1 1/2 cup Cocoa powder ( natural, unsweetened)
Pinch Salt

Mix all the ingredients in a large mixing bowl. Pulse small amounts (I used a small food chopper) to make a fine powder.
Sieve the powder ( there will be small bits left even though it looks fine to the eye) and pulse the rough bits. Mix everything thoroughly and pour into a mason jar ( use a funnel, if you have one, this will not mess up sides and if you do not have a funnel, just snip off the bottom of a disposable foam cup and pour the hot chocolate mix in the jar. Top with peppermint chips and /or mini Marshmallows.

Instructions: To make, puor 1/3 cup of the powder in a mug, pout 1 cup hot milk, stir and enjoy! If desired, add whipped cream on top.
It's cold out there, Baby! Let's warm up with Hot chocolate!


These jars were packed in small bamboo baskets and wrapped in basket bags ( I really have to work on my gift wrapping skills, I suck at it, big time).

Have you also made any gifts this year? Do share your ideas in the comments or on the Facebook page.

Wish you all a Merry Christmas! Hope this holiday season is a happy one for you and your family! 
Pin It

Sunday, December 14, 2014

Fall in my backyard


We are almost halfway through December and in another 2 weeks we are looking at starting a new year.
Did I just blink and did this year also slip through my fingers? When I sit back and think of it, what did I do this year? What did I accomplish? I don't think I have the courage to talk about it,just yet.

Let's go back to something a lot more cheerful.
While most of the country was enjoying fall colors in early or mid October, Dallas was still as green as ever. Weather fluctuations happened and on Nov. 1st. late night, as I peered out, I saw soft snow falling, just a small flurry, it looked like a dusting of powdered sugar everywhere. The colors still remained green on the trees.
Mid-November, things started to change and I saw splashes of color here and there. 

Thanksgiving is a special time. Even if I am late (oh well, I'm early for next year) I wanted to share this with you all. I made these simple sugar cookies and decorated them with royal icing and made small hampers for my son's teachers ( cookies, 'stress relief' hand sanitizer, body mist and thank you card). I loved making these cookies and even better, my son loved eating them! He watched *carefully*, with bated breath, as I packed the little hampers and let out a *huge* sigh of relief when he saw me piling the cookies in the box kept aside for him.
I also made small hampers for our bus driver ( who displays a lot of patience, I know that I am incapable of. Imagine a gaggle of about 40 kids in high spirits, some 4 year olds howling for mommy and older ones talking loudly)  and one for a senior citizen who is the crossing guard near our bus stop and the public school crossing. 
You can easily make these into Christmas cookies. Packaged carefully, these can make nice gifts.


For the cookie, I needed a recipe that  did not 'spread' while baking. There are plenty of recipes out there. I used this recipe.
I got these cookie cutters from Michaels. For the decoration, I used Royal Icing and used the flooding technique.
YouTube has several videos on how to use royal icing to decorate the cookies.
It just takes a bit of patience and practice to make and decorate the cookies.

For myself, I like plain cookies, they taste so good! Not that I had the chance to taste the decorated ones. Li'll S guarded his loot rather jealously.

I am now looking at Christmas hampers and gifts.  What are your plans for Christmas gifts? Please share your ideas here, in the comments below or on the AC@H Facebook Page.

Have a wonderful week ahead!
Pin It

Wednesday, December 03, 2014

Ridge Gourd Curry

This time last year, I used to drive home 3 kids from the bus stop. Li'll S, Li'll V and Big S. The ride was a short, but an interesting one. The topics would be varied and the discussion, deep.
My son was the funny one, in the group. Big S was the one who had a topic to talk about, being the eldest.
Little V, as her mother rightly says, is not one to take a back seat. One tough cookie ( but very sweet) who had her say in everything!  Her favolite colol was led,she wanted to glow her hail leally long, she leally liked leading and she loved watching caltoons on TV and leally planned her playdates and sleepovels down to the last detail.

I miss listening to the chattel , chatter....

Today, Big S has moved to sunny California and Little V to another school. 
I do get to meet Little V's mom and she regales me with her adorable daughter's stories when we meet for potlucks.

On one such potluck, Little V's Mom got this very simple and very tasty vegetable curry. Most of us, in our potluck group are wimps when it comes to handling spice and this vegetable entree was just what suited us. 
Unlike most vegetables, this does not have any spices, but don't let that deter you from trying it out. Mild yet very tasty, this has won the 'Kid Approved' badge of honor. Thank you, S! 

While I was never a big fan of the ridge gourd, I have tried out this version and loved it. But I try and avoid peanuts as much as possible, now ( they give me migraines)  and so, this version is made more often. 


Ingredients: 

1/2 cup Moong daal ( skinned , yellow, in this case)
2 long Ridge Gourds, peel the outer tough skin, remove the fibrous part and dice into small pieces
2 small Tomatoes, chopped
1 medium Onion, chopped
1 tsp EACH Mustard and Cumin seeds
3/4- 1 tsp Turmeric powder ( I eyeball it)
1/2 tsp Red chilies powder ( I use Kashmiri) or to taste
Salt 
Handful coriander leaves

Wash and soak moong daal in water for 30 minutes. 

In the mean time, peel ridge gourd and cut into small pieces.

Heat oil and add mustard seeds, as  they begin to pop, add cumin seeds. Add  the chopped onion to it  and fry until cooked and light brown.

Now add ridge gourd pieces, tomatoes, soaked daal , turmeric, salt, red chili powder and coriander leaves.

Cover it  and let it cook for 5 to 8 minutes on medium heat.

Now add little water about a half cup and cook until it's done.

Serve hot with rice or fulkas.


NOTES:

Ridge gourds, look long and you might feel 2 is probably a lot, but once the peel and the inner fibrous part is taken off, you are left with little vegetable, apart from that, in Marathi we call this a 'chorti bhajee' / चोरटी भाजी , meaning it shrinks, something like okra, if you know what I mean.

I have often heard ladies complaining that Ridge Gourds are sometimes bitter, though I have never had the misfortune to get one, on the safe side, I taste- test when I buy the gourd, as taught to me by an elderly Gujarati lady at the grocery store. I snap off a small piece and pick and taste a bit before buying. 


Pin It

Tuesday, November 04, 2014

A Halloween Party, in a jiffy!

--
Hello Everybody! I'm back after what seems ages and so much has happened! 

Firstly, Diwali was the best in many years. Not because I made the goodies (like I do every year) but ...... this year, I made them with my Mother! Oh yes! The parents are here. 
I am happy, is an understatement. After the scare last October, I consider this a miracle and am thankful for it, every single day.

Li'll S is thrilled. He looks for his Ajji ( Grandmother) when he gets down from the school bus and after dumping his backpack with me, holds her hand and walks off. 
He loves to play with her (of course he does, she allows him to win, every time). He is careful around my Dad, I have warned him. But he was happy when Ajja ( Grandfather) came to pick him up at the bus stop and his little chest puffed out as he strutted to the car. 

After a wonderful Diwali, we were looking forward to Halloween. Li'll S was. He was excited, he wanted a pumpkin, he wanted a super hero costume and most importantly, he wanted a ton of candy. 
So we picked out a pumpkin, lugged it home, which by the way was so heavy, that I knew, it was going to hurt my tendinitis affected hand. What the heck! The child was happy. But I drew the line at carving, there was no way I could do that,  M would not bother and my parents have never done it..... solution? A short trip to Dollar Tree and 2 packets of push-pin type scary pumpkin decorations ( and a mummified skeleton and bat silhouettes and 'blood' cling stickers and a scary 'werewolf' faced wall decoration and a tombstone ) later, we came home.
Up until then, the plan was just to decorate the house, go trick or treating and then eat out.
And then the child says, now lets make it a party. 2 days before Halloween.

I whatsapp'd my friends and invited them over. Everybody contributed something towards the party, this was an unexpected gesture and so welcome, their contribution and more importantly, the help and fun that they added to the whole thing! I am lucky to have such sweet friends.  
The plan was simple. Go trick or treating, come back and meet at my place by 8:30pm.
My menu was simple.
Pizza, snacks, goody bags, candy and a 'witches brew' drink.

Ring the bell, IF you dare to enter....
                           

For those like me, who cannot carve pumpkins for some reason, here is a safe alternative. Just push in the eyes, nose and mouth ( which does not look too bad, up front) and be done with it. 


For the snacks I made cupcake 'ghosts', a giant cookie and broomsticks.
The frosting was Butter cream, which made it easy for me to make lumpy ghosts .
The giant cookie was a chocolate chunk, baked in a rectangular 9 x 13 pan ( next time I'll use a bigger pan) and decorated quickly, with the same butter cream.

alt="kids Halloween party snacks"

The 'broomsticks' were made simply by cutting string cheese and inserting pretzel sticks. I used a knife to fray the ends a bit to give it a 'broom' like look, not very nicely done, I'm afraid. But the kids loved it.
alt="Halloween party pretzel and cheese  broomsticks"

The 'Witches brew' ( no picture, I'm sorry) was made by mixing Pineapple Juice ( 1 can - 46oz), Ginger ale and Lime soda (one, 2ltr bottle , each)

The children had a great time and there was a lot of noise and high spirits. The children who had gone trick and treating showed each other their candy and added more from the bowl at home and compared and gave their opinions. 


Li'll S and 3 others ( accompanied by adults) had braved a haunted house in the neighborhood for candy and came out all of a dither! A zombie tried to take my son's candy filled jack-o-lantern, which scared the daylights out of the child! 
All 4 kids came out of the haunted house shaking at the knees and swore NEVER to go to one again. EVER.

We are now looking forward to Thanksgiving. 


I know I have a lot to be thankful for.
Pin It

Friday, September 19, 2014

The Perfect Pizza

Years ago, one cold winter night, the husband and I, after strolling through the Christmassy streets and admiring the beautiful lights and decorations, finally paid heed to the gnawing pangs of hunger that only a cold winter night can awaken in a person.
The urgent need to stuff our faces with something hot and filling was mounting and we turned our steps purposefully towards where we would find food.
We walked quickly and entered a pizza restaurant. I wish now, I could recollect the place or name of that restaurant, but all I remember are some details, like the color scheme was red and white, of course, had a 'cave like oven', there was a small table inside that we bagged and placed our order for pizza. 
I could not take my eyes off that 'cave', it was the first time I had seen a wood burning oven and the whole thing was a novel experience to me. 
I was amazed at how deftly the pizza dough was tossed in the air and caught, "dayyum (you know what I mean), look at that, those are mad skills and here I was, feeling proud that I could make round-round fulkas!" 
The expert then shoved the whole pie from 'an oar' in to the oven where the blazing fire baked it to absolute perfection in no time at all.
The terms pizza paddle, pizza stone were alien to me and I  just processed the info in terms that made sense to me.
It took me a while to bake my first pizza. I was over the moon. I stuck to this recipe and never thought of trying anything else.
Why let go of a good thing, right?

WRONG.

Let it go  (I know you just sang that part :) )

There is a difference between good pizza and GREAT pizza.

Last week I tried something new, rather apprehensively. Though baking is not as intimidating to me now, I do not consider it easy.
But how could I not pay heed to something that read so well?
Turns out, this was the Bestest Pizza ever ( according to M as well as Little S)
I was so pleased that a picture of a small pan pizza while baking was posted on the Facebook Page and  I got several requests for the recipe.

The only reason I could not post earlier was ( brace yourself, this is a sob story) the laptop, with all my pictures, crashed. I have no clue why ( of course I got blamed for being careless and not taking backup despite having a back up disk... yada...yada) and I still cherish the fond hope that someone, somewhere will help recover the darn laptop, just long enough for me to rescue my pictures and videos.
And let me add, while the iPad is fine and everything nice, where and how the aitch am I going to upload pictures from my camera? Aitch,  it won't even let me paste a link in the draft post.
Anyhoo, a miserable face and constant cribbing and whining and moping finally gave me access to M's laptop and here I am clicking away, happily.
No picture, I'm afraid, but not too long, I have promised my friends, that I will make pizza for them and I will take pictures then.

In the mean time, here is the source of this fantastic recipe and  my adaptation below.

To make the base
Take 5 cups of flour ( maida)
2 tsp salt
2 tsp sugar or honey
2 cups water - room temp
1 tsp instant yeast
1 tbsp oil

Start with combining flour, yeast* and salt and mix well to combine
If using stand mixer use paddle ( if u don't have a paddle attachment, use the dough hook). On low speed mix the dry ingredients - just to ensure distribution.
Now add the liquid.


*If using regular, active dry yeast, let it bloom in warm water to which sugar is added and then add this to the flour

On the mixer, use low Speed and paddle and mix till the dough absorbs the liquid. There shouldn't be any dry flour  on the sides or bottom.
Takes about a minute
If using hand ( wooden spoon) stir well till the same result is achieved - all liquid is mixed in dry ingredients.


Let the dough stand for 2-4 mins
Now, on the mixer, start on medium-low speed and let it go on for another minute.
If using hand, follow same mixing procedure of mixing with the sturdy wooden spoon.
The dough should be soft and slightly sticky.

Now u need to use your counter top.
Pour some oil on the clean counter top and spread oil in a large circle ( like an ex-large pizza shape)
Now, gently dump the dough on the oily surface and pat it.
Use a stretch and fold method.
This simply means, after you have gently patted the dough into a circle, fold it. First fold on the top and then at the bottom, u should have a rectangular block with round edges.
Fold the round edges over one another.
Cover this dough with a clean  bowl.
Let it stand for 5 minutes.
Repeat the stretch and fold
For 3 more times (total of 4 times).
After every 5 minutes , u will notice how the dough changes. The gluten is working here.
The dough becomes firm.

At this stage, you can divide the dough ( maybe into 2 parts. One to be used now and other frozen for later.
Oil the dough u want to freeze and transfer to a freezer safe bag or container and put it away

After the above, transfer the remaining dough ball to a well oiled bowl ( I used the big Pyrex one) and cover the bowl with plastic wrap. Make sure the bowl is big enough to accommodate the doubled dough as it ferments.
Stick this bowl in the fridge and leave it  overnight to ferment slowly. This slow fermentation is the key to a perfect crust.

When u are ready to make the pizza, pull the dough out 90 mins before  you start.
Leave it on the counter top.
Start by preheating the oven to the highest level ( mine goes to 550) so yours should do the same or about 500 at least
I use my pizza stone and that is the best way to make an awesome crust. The stone retains heat very well and that helps the crust.
Keep in mind that the pizza stone needs time to heat thoroughly, I'd say 35-45 mins. 
If you don't have one, use what you normally do.

Do the prep (sauce,chopping veges/ meat, grate cheese) and keep everything at hand.

Once the dough is at room temp, lightly flour the (clean) counter top and lay the dough ball and pat it gently with your finger tips and form a circle.
Now comes the stretching part.
Flour the back if your hands and gently lift the dough onto your balled hand ( think like a boxing stance) now gently turn the dough on your fists and do so along the edges, let gravity do the rest.
Let the dough rest in between if you think it's not panning properly. Letting the dough rest will ensure that it will stretch well after a while and make the dough supple.
If using hands to stretch the dough is difficult or you are just not ready for it, go ahead, lay it on the paddle and stretch it with your hands or even a rolling pin, but be gentle)
Once the dough is even and large, transfer it into a lightly floured paddle ( I do not have one- I use my large wooden cutting board) and even out any unevenness ( ummm.. I know that did not sound right, but I hope you get my point)
Now add sauce. Spread it out carefully, starting at the center and going outward. Leave the border bare.
Add the cheese now (use mozzarella - cheddar  and if u like, sprinkle some Parmesan)
Lay the vegetables over the cheese.

By now the oven and stone are very hot. Be very careful ( I prefer to wear my sunglasses when I work with such a hot oven) and open the oven door.
Lower the paddle and in back and forth motion? Shake the pizza on to the stone.
Close the oven door and leave as it for about 2 mins.
After 2 mins, open the door, carefully, and turn the pizza in a clock wise or anti clockwise, half way,  direction to ensure even cooking.
At this stage, you will notice how the dough has puffed up and has started getting brown.
After you have turned the pizza, let it bake for another minute or 2. This will ensure that  the crust has baked to a nice golden brown and the bottom is also well done .
Pull out the pizza carefully and place it on the chopping board and cut into wedges.
Serve with chilli flakes and grated parm cheese or marinara to give it a pizzeria touch.

I must mention here, I went all out this time and made marinara sauce at home too. For this, I got messaged Shilpa, I remembered having read the recipe on her site as well as on her FB page.
She promptly replied with the recipe ( and also told me that the original came from Pelicano).
I made the sauce as per the recipe and it is a keeper.
The only suggestion my son had was, to use more. That is proof enough.

Notes:
I got a few questions regarding the recipe (the base) and decided to clarify these as part of the notes

- The pizza stone has to be 'really hot' in order to get the best crust.
- It takes a good 40-45 mins for the stone to heat up and retain that kind of heat. Once I put the dough on the counter top and cut the vegetables, I switch on the oven and leave it, so I get good 50-60 minute heating time (and hence the sunglasses when I open the oven door)
- Yes, you have to set the oven to the highest temperature it will go to
- Does it take just minutes to bake? yes, it does. But do use youe judgement here, you will see the dough bubble and start turning brown, let it turn dark and then change the direction and let it bake some more
- check the bottom of the pizza with a long handled spatula, it should look well done (brown, but not dark!)


That's it for now, folks. I'll be back soon with some pictures.
Enjoy the weekend.
Pin It

Tuesday, July 08, 2014

Left Over, make over. Cake, berries and cream, Voila! summer dessert!

Over the past few months, I had the opportunity to make cakes for my friends and their children. Most of them being my son's age. 
It is fun to bake and to make a cake the child has dreamed of. Kids have fantastic ideas. 
The satisfaction of making their eyes sparkle on their special day and of course the kind words parents shower on me really make it so worth the effort. 

It all started with Sonali asking me to make a Black Forest cake for her husband's birthday (Sonali's favorite cake) which was a hit! 
That was followed by the same for Sonali's Birthday, naturally. 

Cake, berries, whipped cream

Then a small cricket enthusiast celebrated his 7th. Birthday.
His Mother and I put our heads together and came up with the idea of a cricket themed cake. She gave me full freedom in regard to the design.


If you ignore the mess in the background ( that is keeping my son busy, he was SO interested in 'decorating this cake' that I had to give him something else to mess with, that yellow fondant mat, I asked him to make some accents with that mat, the poor baby ran around getting things ready to make 'em) 
The cake was a 2 layer butter cake with a whipped chocolate ganache in the middle and a Cream cheese- butter cream frosting.
The 'grass' is cake crumbled and colored green and then toasted till crisp.
The cricket pitch is fondant ( home made, marshmallow Fondant) 
The cricket bat and the player are hand made ( my first attempt) with Gum paste.
The ball is Fondant and the stumps are made with cake pop/ lollipop sticks


The second opportunity came when my dear friend A, was taking a cake as a surprise for a friend's birthday. She wanted a black forest.
During the same time, my son had the last of his Marathi classes. I made a batch of Eggless Chocolate Cupcakes and decorated them with Nutella Butter cream and packed them all fancy, the kids loved them! 


And just last month, my friend T's son turned 6 and they had a big party and the theme was 'aqua'. It was a pool party with an entertainer ( with a water slide) and the kids had fun.
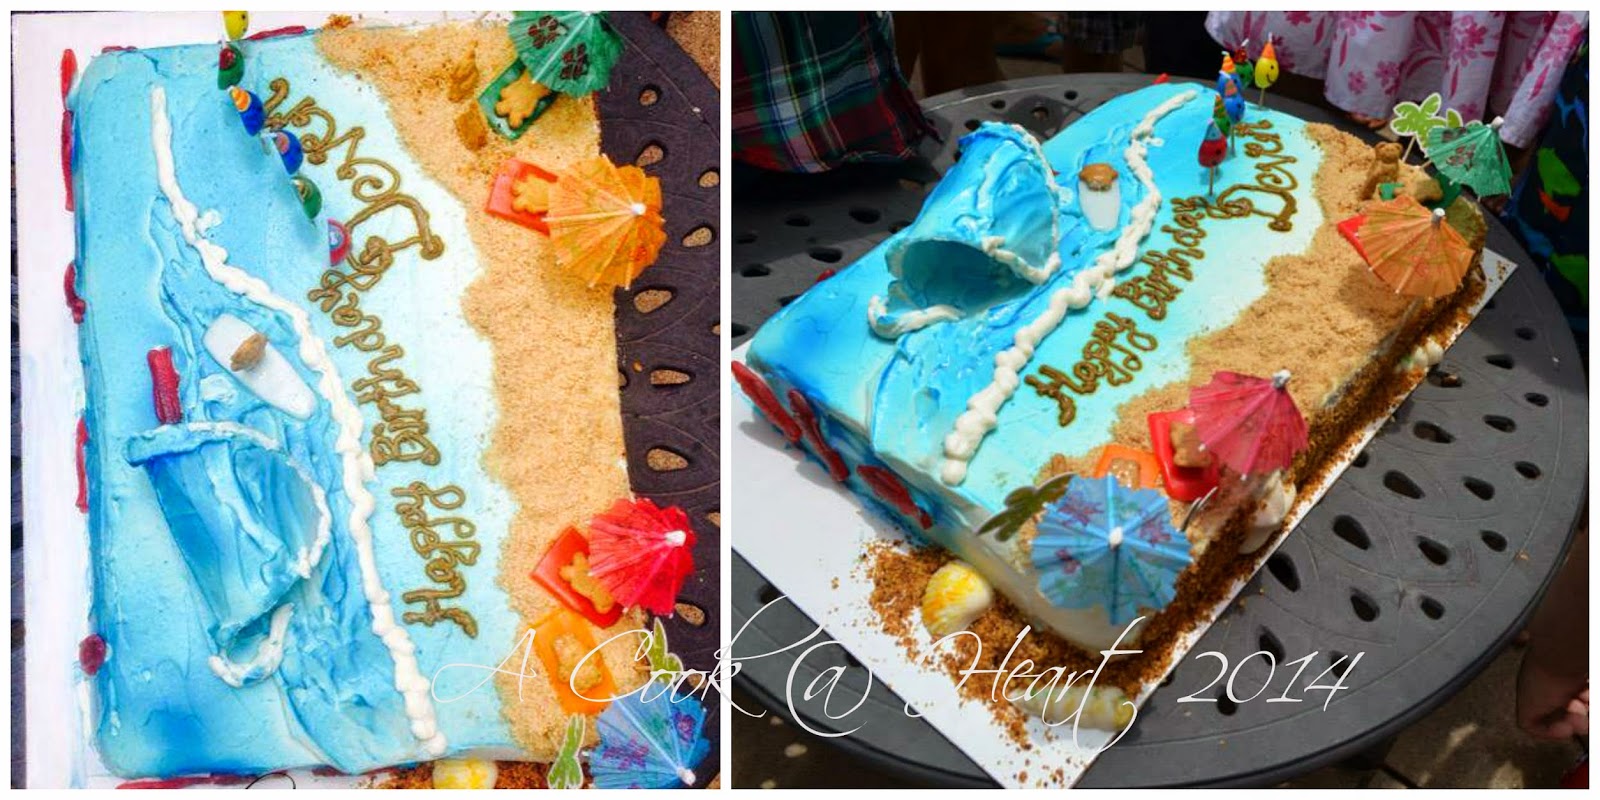
The parents and I sat down and decided to make a cake that was 'beach themed'. 

 The cake was Vanilla and Chocolate marble cake with a whipped cream frosting in the layers as well as on top. 

I used Blue mist to color the ocean and used a Foam cup to make the wave and added a dollop of cream. 

White whipped cream was used to make the ocean foam.

The 'sand' was made with crumbled graham cookies

The Graham Teddies are laid on 'Air Heads' candy beach towels and the Surfer Teddy is also on an Airhead surf board.
Can you spy the shells on the cake board? these are made  using candy molds ( from Michaels) and melting chocolate.

And then there was my Spider Man cake for my son. 

What with all these cakes made, I have a lot of leveling to do and so there are always the domes to 
either throw or eat. 
I hate wasting food ( look in my fridge, you will find small Rubbermaid or Pyrex food containers containing daal or vegetable, just those 5-6 tbsp. that was left over :) ) 

And so, these 'domes' get a makeover! 


summer dessert

What you need is: 

Left over cake ( cut in cubes)
Whipped cream
Sliced and macerated Strawberries ( or Raspberries or a medley of berries)

Place cubes in the bottom of the serving cup/bowl of choice.
Top with the sweet berries with juices.
Swirl (or spoon) whipped cream .
Add a few more cubes of cake and repeat with the berries and cream.
Top with a fresh (washed) strawberry and serve.


These were a hit with my son! It meets the 'Kid Approved' category award. 
For left over Chocolate cake domes, you can pair it up with either fresh berries or even Cherry Pie filling and whipped cream, Black Forest in a cup! 


This makes a light and easy dessert option and looks SO pretty! A wonderful and easy to make summer dessert.
Pin It

Thursday, July 03, 2014

Spider Man, Spider Man, does whatever a spider can.....


A month ago, the Little one turned 6. 
Not so little anymore, huh? 

Still looks little to me.

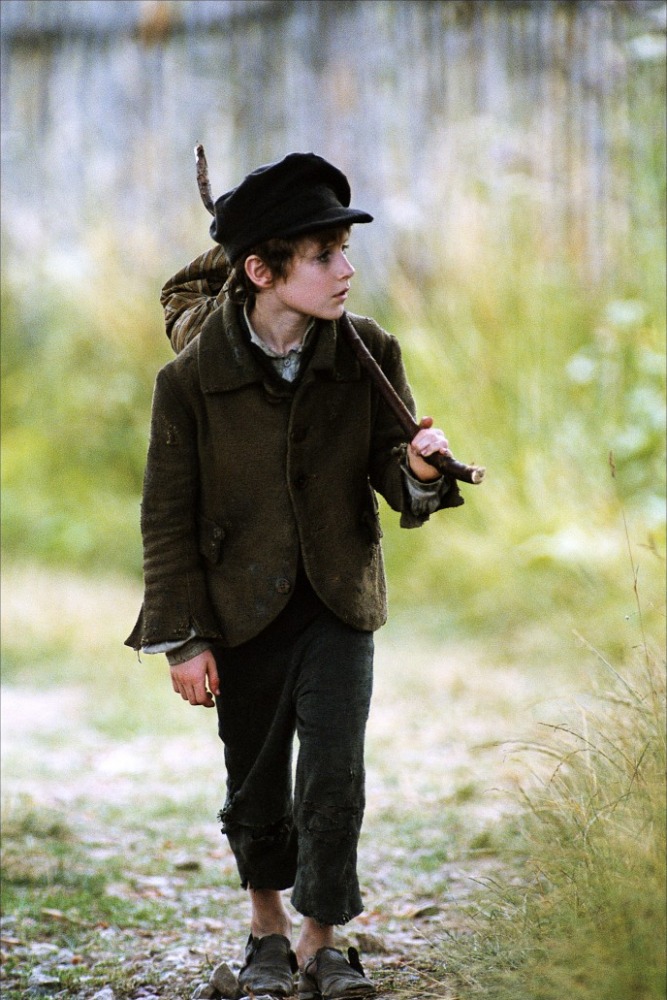
And then I see, the kinda new school trousers skimming the ankles and I think, " I just got those. they look new ( unlike the  trousers I got at the beginning of school year, those are in such a bad condition, if I have my son wear them today, they are short, worn and torn and frayed, why he'd look like Oliver Twist !)
Makes me smile to see him grown up and yet, such a sweet innocent little heart tugger (you know what I mean)! 

School was still in session when he celebrated his birthday. We gleefully packed the goody bags that he proudly took to school.
Sadly, the school does not allow Kindergartners to have any celebration at all, so making and sending a cake was not an option. I made a small cake at home and we had a small celebration.

There was talk of the birthday party. But that got muddled with apartment hunting, which was exhausting but .... all's well that ends well.We found something suitable and sealed that deal.

The topic of the birthday party was on! 
It was decided that I would host a small Mother and kids pool party. Mid-week, my friends agreed and it was settled. The moms would also get in the pool and splash away! 
I have good friends, they agreed on such short notice. 

The main thing in a birthday party is the cake. Last year, Little S wanted a Burger cake. This year, it was Spider-Man.
Surprising, because he is not really a spider man fan (I am). But, if that's what he wants, that's what he gets.
I looked around and finally settled for this.
And though this could have been loads better, I am glad, I tried and most importantly, the birthday boy was thrilled.


The cake was my old reliable, Vanilla cake. The filling between the layers ( I kept it at 2 layers only) was macerated Strawberries ( wash, dry and chop the berries into slices and sprinkle with powdered sugar, cover and let them sit in the fridge) and whipped cream. For that, you need, 2 cups Heavy Whipping Cream, 1/4 ( or less, say 2 tbsp., your preference) Confectioners sugar and 1 tsp Vanilla extract. Chill the bowl and beaters for about 15-20 mins and then start the process.
Add the ingredients in the bowl of your stand mixer (or a regular bowl and your hand mixer) and whip on high speed until soft peaks form.

Follow the video instructions for assembly.

I used Butter cream for the top layer of frosting and Gel color to get this vibrant shade of red.
The one change I made was, I used Salted Butter, instead of unsalted butter, it helps tone down the cloying sweetness of  the frosting. I went with this frosting because it holds up well in the heat and would not turn runny or spoil in any way. Plus, butter cream is a dream to work with.

I had a wonderful time making this cake but ( yes, there is a 'but'), I dislike using so much color.
I gave this some thought and I wonder if spraying the cake with red color would have helped? It would have made things easy for me!
It's all learning. Maybe next time.

That border got cleaned up before cutting the cake

That's it from me. Enjoy the long weekend folks and stay safe !
Pin It
Share

LinkWithin

Related Posts Plugin for WordPress, Blogger...
Page copy protected against web site content infringement by Copyscape