Showing posts with label Electric Pressure Cooker recipe. Show all posts

Thursday, September 14, 2017

Pullikachal (Tamarind Sauce for Rice) Instant Pot / Electric Pressure Cooker recipe

Many years ago, a cousin told me about MTR Puliogare powder and raved about it. We got a packet and used it and liked it. It was a novelty for us, the tangy taste was unlike any we had tasted before.

The powder was also very convenient to have on hand. 
I used to work in shifts, I would come home at all odd hours and sometimes, starving. When the work load was heavy, we would miss meals to cover up the workload. 
On those days I would come home, in the middle of the night, hungry and dead tired. My parents would be fast asleep and I did not want to wake them, I would quietly go to the kitchen and make myself some Puliogare rice with the left over rice my Mother would keep for me. 

After marriage, M introduced me to a particular brand (I forgot the name) that came in a bottle in the paste form, which was better then MTR and we would enjoy mixing it with plain rice.

When we moved to the USA, we switched back to MTR. We tried other brands (paste) but did not like any.
I searched for a recipe on other blogs.
I found and tried some recipes but nothing clicked. The process was also tedious. 
I dropped the idea for a while and went back to store brought mix.

And then, I saw a recipe which made the whole process simple, made using the Electric Pressure Cooker / Instant Pot.
This solved my problem of baby sitting the  whole thing. 
I used the timings as specified by a FB user Lavanya but modified the spice proportions to my taste.
Spices to be powdered and added to the pulp


To make the spice powder you need:

1/4 cup Coriander Seeds 
1/4 cup Chana Daal
1 tsp. Fenugreek seeds
    1/4 cup Sesame seeds
    8-10 Dry Red chilies ( I used Byadgi variety)
    Few curry leaves ( I used about 2- 3 sprigs)

Dry roast each item separately until the dals are golden brown and the chilies and curry leaves are dry and crisp.
This can be done in the EPC/ IP as well on saute mode. But I used my stove top for this.
Cool completely and grind to a fine powder. I used my coffee mill for this.

To make the Pullikachal / Puliogare paste you need:

One small packet of Tamarind (easily available in any Indian store)
Gingelly (sesame) Oil
1 tbs Mustard Seeds
3-4 Dry Red Chilies ( I used Byadgi)
Few curry leaves
1 tbsp chana Daal
1 tbsp Urad daal
1 tsp Turmeric powder
1/4 cup Peanuts
1/4 cup Cashew nuts (optional, but I like them)
Salt to taste
1 tsp Asafetida powder
2 tsp Jaggery crumbled ( this is my choice, the original recipe does not call for it)

Soak the tamarind in warm water and squeeze out the pulp. Discard the solids.

Start the EPC/ IP on Sear / saute Mode. 

Add Gingelly oil, generously. I added as much as needed to make a thin layer covering the entire surface of the cooker inner pot.

Once the oil heats up add the urad daal and chana daal and mustard seeds . 

As they pop add the daals turn golden brown, add the (raw) peanuts and saute till golden. If you use roasted  peanuts add cashew pieces along with the peanuts. Add the curry leaves, red chilies. Saute till the oil has coated all the spices.

Add the tamarind pulp and mix everything well.

Cancel the Sear Mode at this point.

Switch to Slow Cook mode and set it for 3 hours. Close the lid and leave the 'whistle' on Vent mode.

Forget about it for 1 hour and 45 mins. 

After that time, open the lid and you will see the liquid has reduced by half or more. 

Now add in the turmeric powder, salt and the ground spice powder. Mix well to incorporate the spice powder very well with the tamarind. If you opt to add jaggery, add it now. 

Close the lid again and let it slow cook for the remaining time on the timer.

At the end of the cooking time the oil will separate from the mixture. 

Puliogare /Pullikachal is ready.


To make Tamarind Rice:

Add a dollop of the Puliogare / Pulikachal paste to cooked and cooled rice. This depends on your taste buds, adjust the spoonful to how strong you want to make it.

Mix it well and serve. 

As simple as that!

This is a life saver on Monday mornings, I can tell you.


Notes:
  • Do not skimp the oil
  • Use Gingelly / sesame oil, it imparts a special flavor
  • Store the Pulikachal paste in a dry airtight container
  • Use a dry spoon every time you make Tamarind rice
  • The addition of jaggery is my choice, just to balance out the extreme tartness.
  • Unconventional as it is,  I had also added 2 tbsp. Sambar Podi to this mix, when I made a fresh batch.


Pin It

Wednesday, May 10, 2017

Kofta Curry (IP recipe) Bottle Gourd & Zuchhini dumplings in a rich and aromatic Gravy.

How do you all plan a menu for guests? Do you make multiple dishes? Like 2 gravy based vegetables, 2 dry, roti and puri, pulav and dessert to follow.
Or, do you plan a simple and manageable menu?

I am the latter type. I plan a manageable list of things I can cook without getting frazzled. IMHO, I also like to keep it simple because too many items on the menu may mean that the guest may not be able to do justice to it all or not sample something at all. 
It all ends up in too many leftovers which, honestly, no one likes to eat again. 

There was also another discussion, on a FB Food group, where a member asked how we plan a menu. By cuisine, she meant.
When I thought about it, I found myself thinking, if I have guests from the North of India, or East or even from Maharashtra, I go ahead and plan a South Indian menu. 
And a North Indian menu is of course welcomed by almost everyone.

Do you step out of your comfort zone and try something new? 
Contrary to what I have been taught, namely, 'when you have guests, make what you are confident about, this is not time to experiment', I go right ahead and try something new. 
How do you plan a menu for your guests? Please share your tips and tricks, I'd love to hear from you.

A few weeks ago, we invited M's friend and his family for dinner. I made this kofta curry and our guests loved it. 
The best part is, it was an easy curry to make! These days I find myself reaching out for my #EPC (Electric Pressure Cooker) all the time. To those of you who use either #InstantPot or a similar EPC will know exactly what I mean. I start my day with setting up my Tea, before I drop off S to school and come home to a perfectly brewed cuppa.
Or , set the EPC to cook a batch of Pav Bhaji as I drop him off to Taekwondo and pick up something from the grocery store that I forgot over the weekend.
Let us however get back to this kofta curry. 

To make the Koftas:
I used this recipe from an old post.
The variation was that I added 1 zucchini to the bottle gourd and used my appe pan / abelskiver pan to sallow fry them instead of deep frying.

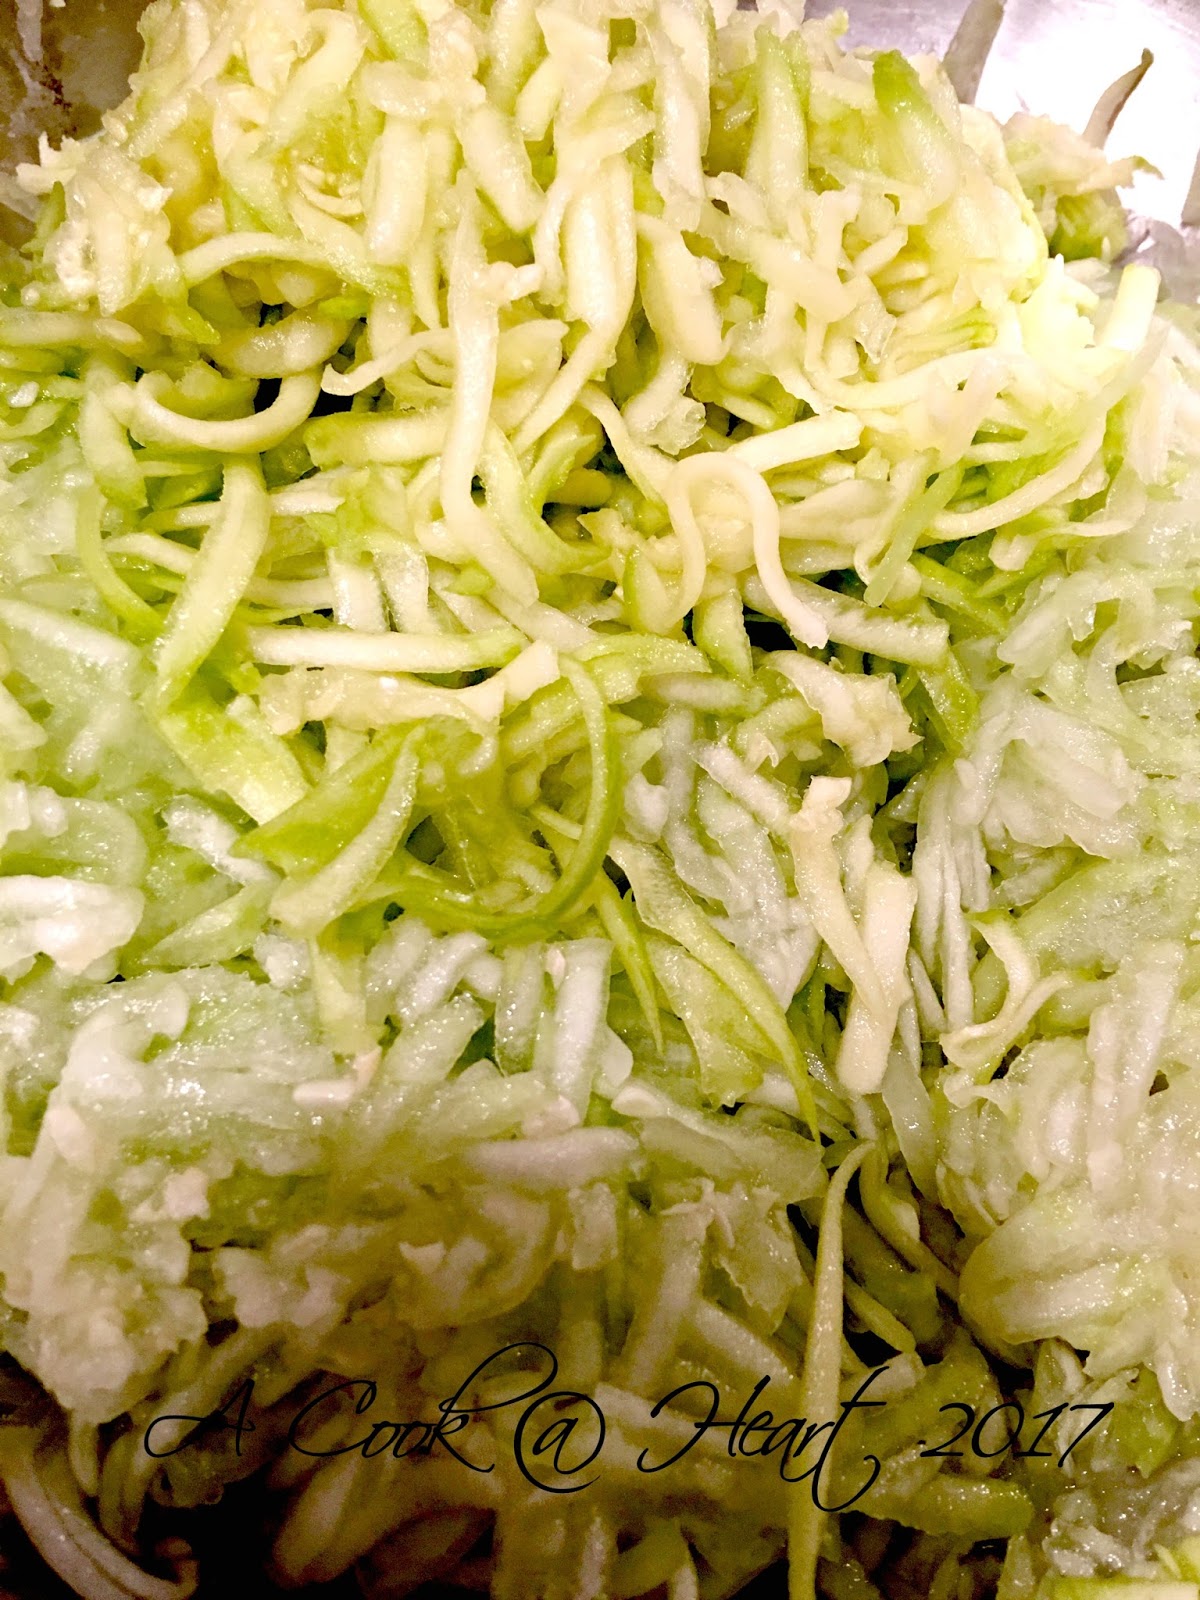
Important: * Grate the zucchini and bottle gourd, sprinkle a little salt and let it sit for 15 mins or so. The salt will draw out the excess water from the vegetables. Squeeze it all out and then use the grated vegetables.
Failure to do this will only make the fritter kofta batter runny and will not taste good. 

Shredded Bottle Gourd (Lauki/ Dudhi) and Zuchhini

Using the Appe Pan / Abelskiver Pan to make the koftas

These koftas freeze very well.


I found this gravy recipe here. I modified it slightly to suit my requirement and also based on what I had in my pantry.

Here is how I made the gravy:

6-7 Tomatoes, chopped
1 large Onion ( I used Red Onion), Chopped 
8 fat cloves of Garlic ( if you have smaller cloves, use about 12), peeled
1 inch Ginger, peeled and sliced
1 stick Butter
Fistful Cashew nuts
2 Tbsp. Kashmiri Red chilies powder 
Alternatively, add 1 Tbsp Kashmiri red chilies powder and 1 tsp Regular (hot) chilies powder for a spicier gravy
1 scant tsp Turmeric powder
1 heaped Tbsp Sugar ( I used granulated white sugar) 
2 Tbsp Kasuri Methi ( dry Fenugreek leaves)
Salt to taste
1/2 cup Water


The Spice Pouch
 Spice Pouch:
1 x 1 inch Cinnamon stick
1 tsp Cardamom (green)
1 number, Black Cardamom (Badi Elaichi)
1 tsp Cloves / Laung / Lavang
1 Star Anise

To Begin:
 Prepare the spice pouch. I used the pouch shown in the picture, it is the 'water filter' pouch one easily gets in India. Alternatively, use cheesecloth (cut it into a square, layer 2-4 square pieces on top of one another) place the spices on the cheesecloth and pull the sides closed and secure with a piece of string. The spices should not spill out. Set aside.

To the inner steel pot of your Electric Pressure Cooker / Instant Pot add
The peeled and chopped onion, just big pieces.
Chop the tomato (quarters). Pitch them in.
Add all the ingredients listed under the gravy list ( from tomato to Water)
Add the spice pouch
Close the cooker and seal the lid ('whistle' set to Sealing mode)
Use the 'Manual' mode and set it for 15 minutes.
Let the cycle complete and the pressure release naturally (NPR)
Open the lid, carefully remove the 'spice pouch'
Using an *immersion blender, blend the gravy till smooth
Add the kotas to the gravy
Switch to the Sear / Saute mode and let the gravy come to a gentle boil and the koftas absorb the gravy.

*If you do not have an immersion blender, let the gravy cool and then blend it in the regular blender till smooth. Transfer the blended gravy to the steel inner pot, you can later add the koftas to it and heat the gravy to let the koftas absorb all the flavor on the 'Sear' / 'Saute' Mode

Garnish with chopped cilantro and a swirl of cream if you wish to. 


NOTES:

- Instead of koftas, add cubed Paneer to the gravy ( Paneer Butter Masala)
- The original recipe calls for Honey, I used sugar instead and used just 1 tbsp. If you like sweetness to the gravy, use more. 
- The original recipe calls for milk to be added to the gravy with the other ingredients, I did not. The cashews did a great job of adding richness to the gravy and I was very happy with just that.
- Use Kashmiri red chilies powder for a deeper red colored gravy. I had the spicy variety on hand and so had to use half the quantity.
- The gravy freezes well, as do the koftas. Just make sure that they are frozen separately. Thaw the gravy  and koftas in the fridge overnight and then heat them (medium-high heat) together. 
Pin It

Friday, April 07, 2017

Fuss free Pav Bhaji in the Electric Pressure Cooker / IP

On my last India trip, my son and I had a blast. I formally introduced him to the glorious street food. We loved the dabeli, the pani puri, the vada paav/ samosa, but the jewel in the crown was pav-bhaji.
We went to Achija and he fell in love with it. It was a first for li'll S and it was so satisfying to see my 8 year old eat with great concentration and enjoyment. 
To date, he talks of Achija and his eyes glaze over and the smile says it all.

S also has high expectations.
There are days when I fret..."So, what should I make for dinner?" 
"Oh, just make Pav Bhaji", he says causally. 
I stare, sometimes I exclaim, " Veda ahes ka?", I mean pav bhaji on demand, come on! 
All this changed a few weeks ago. 
Now, If I have the necessary ingredients on hand, I just nod my head and finish the task at hand. 
No hurry.

When I spoke to my friend Sonali, she told me how much she loves her EPC and how useful it is for cooking almost everything.
She told me she was making pav bhaji for dinner and it was such a breeze! 
I loved the idea. Pav bhaji in a jiffy, on demand.
Instant pot pavbhaji


I like how fuss free and no babysitting required this recipe is.

I like to prep just one thing before hand. I soak dry red chilies in warm water for a few hours, this gives the bhaji it's nice color.

To make pav bhaji in the EPC , you need

4-5 Dry red chilies ( preferably Kashmiri or Byadgi) soaked in warm water
6-8  large cloves of Garlic
1 inch ginger scraped and grated
1 small Onion, Finely chopped
1 small or 1/2 of a large sized Green Bell Pepper, finely chopped
1 can diced Tomatoes 
2 cups Cauliflower florets
3 Potatoes ( I used Russet), peel and make large cubes
1/2 cup Green Peas ( I used frozen) 
Salt to Taste
3 heaped spoons ( I used a plastic disposable spoon) Pav Bhaji Masala (I use Everest)
3-4 tbsp. Oil
Butter, big pats! 
Pav
Chopped Cilantro, to garnish
chopped Onion, to serve with bhaji
Lemon wedges, if required.

To begin, drain the water from the soaked red chilies. Place the chilies and 4 cloves of garlic in a chopper / blender jar and pulse to make a rough paste.

Start the EPC on Sear / saute mode and add Oil and one tbsp Butter to the inner steel pot.
As the oil heats and the butter melts, add the red chilies paste, cook this well. IF the chilies are under cooked, they will make the bhaji bitter.
Once the raw smell of the chilies and garlic is gone, add the chopped onions and saute them well. 
When the onions turn brown at the edges add the reserved chopped garlic and grated ginger and saute till the raw smell is cooked out.
Add the chopped bell pepper.  As the bell pepper softens add the remaining ingredients.
Just pile them in the cooker pot and mix.
Cancel the Sear mode. Close the lid and set the 'whistle' to 'Seal' mode and select the Manual Mode and set the timing for 20 minutes. I might have set it to 25, but 20 is fine.

In the meantime, finish a load of laundry or read a book, drop your child off to an activity or pick him/her up, watch TV. Do what you want!

Let the pressure subside naturally (NPR).
Open the lid and use a potato masher to mash the vegetables well.
Serve bhaji with a big pat of butter, chopped cilantro and soft buttery, lightly toasted pav. YUM!

Notes:
- If you do not wish to use the soaked red chilies paste, you can also use Kashmiri Mirch powder instead. It does not need to be sauteed in the beginning. Add it after the bell pepper is cooked.

- Garlic is what will give it the enticing aroma and do not skimp on this. I used large cloves and so 8 were sufficient. If you have medium or small sized cloves, increase the quantity.

- Leftover pavbhaji can be stored int he fridge.


Pin It

Sunday, March 05, 2017

Vegetable and Corn Chowder (IP/ Electric Pressure Cooker Recipe)

February was the 'Sugar Free' month in the AC@H household. It started off with high enthusiasm and I am happy I could stick to my plan. I admit, there were times I felt like I was caving in, but luckily, I managed to stick to my resolution. 
I also realized that my sugar craving is almost gone. The other day, the son and I made chocolates at home and I couldn't eat a single piece.
Earlier, I would make sheera or something sweet at the drop of a hat and the temptation to sit down to a piping hot bowl of sugary sweetness as soon as it is done was unbeatable, but not anymore! 

I am so glad I did this.

But I also realized that sometimes, sugar, in small portions is ok. For example, a bit of sugar in pohe and upma elevates the taste and balances the flavors. Ditto with some vegetables (for example, this simple Dudhi chi bhaji or cabbage (made the Maharashtrian way).The addition of sugar makes it taste so good! 
My morning cup of chai is what gets me going and adding a bit of jaggery to it makes me happy. It's the one concession I will make. It helped me stick to my resolution, I believe.  

So to sum it up, avoid sugar where you can, if possible, substitute with jaggery (at least it has iron content) and when absolutely neededuse sugar in small quantities. 

I have also been making good use of my EPC. With the temperatures still low and snow piled up till the end of February, it's was very cold.  Cold....cold evenings and piping hot soup make such a good combination.

When we first moved to Utah and stayed in the hotel for a while, eating out was our only option. I carried the EPC,but who wants to stock grain and oil and spices in a hotel room. The lingering smell is unavoidable and I was not going to have it sticking to us as well as all our belongings packed in suitcases. 
So on the bitter cold evenings, we would bundle ourselves in the car and drive to Zupas (which, by the by, was opposite the hotel, but we weren't inclined to trudge through the snow and wind) and fill up on heartwarming soups. 
I tried Vegetable Chowder for the first time and loved it. 
After that, I scoured the net for recipes and found so many that my recipe is a mish-mash of all I read. 
It is very simple and also a very forgiving recipe.
Approximate measurements are fine as long as you are careful and don't overdo anything.

Start with chopping vegetables, I used my chopper to get even pieces. 
I used  1 Red onion, 1 Russet potato, 1 (big) or 2 medium carrot, 1 zucchini and 1 - 1 1/2 cup corn kernels.
This made enough soup for one dinner (for 3) and M took some to work the next day and I slurped up a small bowl for my lunch the next day.

Start the Electric Pressure Cooker (Magic Chef/ Power pressure cooker / Instant Pot) and use the Sear/ Saute option.

Heat oil and add the chopped onion and saute till translucent. Add in all the chopped vegetables and mix for a minute or two. 

Add 2-3 tbsp. of All Purpose Flour ( this acts as a thickener)  and mix well to coat the vegetables.
Add salt, pepper and about 1- 1.5 tsp seasoning ( I used Italian seasoning, it's what I have on hand, you can use oregano / mixed herbs/ thyme) and added a dash of red pepper flakes. 
Add 2- 3 water / vegetable stock, stir well. 
Press the 'Cancel' button and seal the pressure cooker (whistle on 'seal' mode). 
Set it on 'Manual' mode for 2 minutes. QPR (Quick Pressure Release) once the timer beeps. Be careful when releasing the pressure, the steam can burn!


Add 1 full cup of milk ( I used whole milk, you can use half-n-half if you wish, to get a creamier version) and mix.
I noticed that my soup was a bit watery and so I used the immersion blender and blended it just a bit. The pureed vegetables gave the soup some body and it was perfect.

Turn on the saute mode again. and let the soup come to a gentle boil stirring almost all the time ( I was worried, because of the milk, it may not be needed). 
Grate and add Cheese ( I used Sharp Cheddar) and mix to incorporate.
Once the cheese is mixed in the soup switch off the EPC. 
Taste and adjust the seasonings.
Soup,one pot meal, chowder, vegetable chowder

Adding 1-2 cloves of minced Garlic (after sauteing onion) also tastes so good. I cannot recollect if I did or not, but as a side note, add in some. 
You can also add Yellow squash, celery, broccoli florets if you like. 
Adding Quinoa will amp up the protein. Just make sure you rinse it thoroughly to avoid the bitter taste.
Serve hot. Add a dash of red pepper flakes if you like. 
Adding some crushed tortilla chips as a garnish to vary the taste.

What's on my mind now.

I want to learn to enjoy salads and also to cut down on carbs. I also want to cut down on snacking. I love crunchy snacks and fall prey to them very easily. I did that just yesterday on my weekly visit to the Indian store. phrrrp! 
I guess, once I finish this lot, I will try and not buy any or at least but and v-e-r-y  s-l-o-w-l-y eat my way through the bag. 

The other thing is, to use my EPC more than I already am. I love using it for boiling eggs (makes the perfect boiled eggs and no babysitting), making chaivegetables, rice and khichadi, steaming ALu wadi, making yogurt and fermenting idli/dosa batter and very recently, dhokla and pullikachal ( coming up on the blog soon). 
I will update this place as I experiment and hope it helps fellow EPC users. 

Have a great week ahead, folks! 

Pin It
Share

LinkWithin

Related Posts Plugin for WordPress, Blogger...
Page copy protected against web site content infringement by Copyscape