Friday, January 21, 2011

Chocolate Chip Cookies


There was a phase in my life when biscuits ( as we call then in India) or cookies  were a large part of my diet. In fact there were many phases like that. My parents were working and so I had the house key round my neck and  after school I could do as I chose for a couple of hours. 
My schedule did not change, I'd come from school , enter the house, fling off my shoes, throw my school bag, head right into the kitchen, gulp a huge glass of water, hunt for something to eat (though my Mother used to keep healthy and filling snacks on the dining table, I never bothered about them) open  all containers, find the biscuits - eat a few , head to the bedroom, change into fresh set of clothes ( leave the school uniform on the floor), slip on flip-flops and go straight to play with friends. 
Sometimes my friends would come home and  I was a pretty good hostess, I'd serve them water first and then  after a while I'd bring out a platter of snacks ( mainly cookies ) and most unusually, a bottle of pickles... yes, pickles. If that sounds unusual, let me give you the logic behind it. It's like this, if you eat sweet 'X' and  then sweet 'Y', it (Y) wouldn't taste as good, so in order to enjoy every variety, a bite of something spicy or salty was necessary in between  and hence, the pickles. 
Then came my MMS days, my friend ( from Delhi) had rented an apartment close to the college and I parked  myself there during exam time. There was a 'convenience' store opened in the first floor apartment , they would sell biscuits, chocolates, tea, coffee, notebooks, pen, pencil and similar stuff. We would pop down, grab packets of biscuits ( there was a Kellogg- Chocos biscuit brand we favored) and have those  for breakfast and lunch.  After exams we would grab a couple of Vada paav and rush home to prepare for the next days test paper. 

Coming to the USA opened up a world of cookies for me, there was a sea of cookies in so many flavors and I fell in love all over again. Chocolate chip cookies were my favorite and I'd pick every opportunity and reason to eat 'just one'. 
I wanted to make  them at home, I was reminded of Martha Wilson , I was addicted to comic books (still am) and loved Dennis the Menace and thought it very nice of Mrs. Wilson to bake cookies . I had never used a oven mitten and held a tray of cookies  and to me it was almost out of a fairy tale, cookies at home, unlimited supply! And now that I enjoy baking I decided to go ahead and bake cookies. It was natural that I go for chocolate chip cookies. I love them ( who doesn't!?) and my Son loves them. I can get him to do anything for a 'kiikoo', as he first called them.  M says it's hereditary, like mother- like son. Huumph! 


Source: Nestle Toll House Chocolate chip cookies

Ingredients

  • 2 1/4 cups all-purpose flour
  • 1 teaspoon baking soda
  • 1 teaspoon salt
  • 1 cup (2 sticks) butter, softened
  • 3/4 cup granulated sugar
  • 3/4 cup packed brown sugar
  • 1 teaspoon vanilla extract
  • 2 large eggs
  • 1 (the original recipe calls for 2 ) cups (12-oz. pkg.) NESTLÉ® TOLL HOUSE® Semi-Sweet Chocolate Morsels
  • 1/2 (the original recipe calls for 1) cup chopped nuts

Directions

PREHEAT oven to 375° F.


Combine flour, baking soda and salt in small bowl. 
Beat butter, granulated sugar, brown sugar and vanilla extract in large mixer bowl until  


creamy. 
Add eggs, one at a time, beating well after each addition. 
Gradually beat in flour mixture. 
Stir in morsels and nuts. 
Drop by rounded tablespoon onto ungreased baking sheets.


BAKE for 9 to 11 minutes or until golden brown. 
Cool on baking sheets for 2 minutes, remove to wire racks to cool completely. 


* Notes:

I made a few changes , I used regular granulated sugar, I did not have brown sugar on hand. 

Reduced the quantity of sugar to 1 cup + 2 tbsp.


I used 1 cup chocolate chips , M likes just a 'sprinkling' of chocolate, not an overload  :(


I used just 1/2 cup of chopped nuts for fear that little S may not chew them and then have a 

choking fit ( I was wrong, I might as well add, he can chew cookies and chips  and the like very 

well, odd how he has trouble with rice and vegetables and roti.... "heredity" M whispers)


The cookies that were in the oven for 11 mins were crisp, very enjoyable, however 

the 9 minute ones were perfect, crisp on the border, chewy on the inside . This was for my 


oven, I am not sure if oven temps. vary, but I'd suggest you check at the 9 minute mark and 


if required go to the 10 or 11 minutes


Have a Great Weekend!!! 
Pin It

Tuesday, January 11, 2011

Coconut Overload ! Okra smothered in coconut. Simplicity and taste.

For the final 3 years of my graduation, we lived in Santacurz, Mumbai. We had moved there from my childhood home in Wadala. I was not very happy about that. I was strongly attached to Wadala and spent my formative years there and  had many memories and found it hard to let go.  On moving to the new place, I promptly fell ill and  in that fevered state of mind, dreamed that I was recovering in my old home. I still could not call the new place home, it just didn't feel like it. I would unfairly compare everything and everyone. I am surprised I ever made friends or the fact that people even looked at me, I looked like a grumpy bear most of the time.
And then, I liked something. To begin with.. there was ( and probably still is) a 'chaatwalla' on the corner from a  Temple ( behind Aarya Samaj, for those who know it) who sold *mind blowing chaat*, hands down the best I'd eaten. My regard for the new place went up just a notch.
Often, a friend and I would walk down a lane ( I cannot recollect the name, but the landmark was near 'Rakhi's Bunglow' and by that I mean Rakhi Gulzar- as in the yesteryear Bollywood actress not any other infamous Rakhi, thank you) and we would feast on the variety of dosas at the street corner there. She and I  were regulars and the bhaiyya  knew just 'how spicy' we needed our dosas. 
These  food haunts were told to me  by my neighbor's son, who was also fond of junk food and that is probably how I  first talked to him. Strange how food is connected to so many emotions. And how food connects people.
There  is this one trait in Indian families and I am sure it is spread across the nation, we like to share good food. 
What I liked about having neighbors (one of the things) is the 'food exchange' that happened. Your neighbor will just knock on the door and hand you a bowl of steaming hot food with a, " I just made this, see how you like it" and pop back home. And then, you make something and give her a sample in her bowl, when you return it.
My neighbor was a home maker and also ran a day care at home. She would often drop in and bring a bowl of something delicious. One day, we got talking and the topic was diverted to vegetables and I mentioned that okra was my favorite. And she came over the next day with a bowl of Okra smothered in coconut, I greedily ate it and loved it. The simplicity and the mild flavors captured my palette. Years later, I made this in my kitchen and no surprise, I still love this version.
 The easy part is you can completely eyeball the ingredients and  it still turns out great!
 

You need: (this is an approximation only)

2 cups chopped Okra
1/2 large Onion chopped
2 Green Chiles ( + / - to taste) slit in the middle  and left whole
Salt to taste
1 tsp. heaped  Cumin powder and Coriander powder- each -
1 Tsp Cumin seed
1/2 cup  Fresh shredded Coconut
2Tbsp Oil

Wash, pat dry and trim the cap and tail end of the okra and  slice into round pieces.
Heat Oil, on medium high, add the cumin seeds, they should sizzle on contact
Add the green chiles , stir fry for  about 15 seconds or so
Add the chopped onion and stir fry to coat with the oil and spices
Once the onion is  translucent, add the okra and  increase the heat to high.
Stir- fry and coat the okra with oil and monitor carefully   to ensure that the okra is not burnt, however, maintain high heat. This will ensure that the okra is not slimy ( though there is a stage when it will look like that and here the high heat will ensure that it goes away)
Sprinkle in the salt , cumin and coriander powder once the okra is cooked. Reduce the heat to med high
Coat the onion and okra in the spice 
Finally add in the shredded coconut and mix well. 
Cook for a couple of minutes till the coconut flavor mingles, but the coconut does not turn brown. 
Serve hot with roti/ fulkas.

Pin It

Sunday, January 02, 2011

Pineapple Rasam


2010 has disappeared! As always I feel the year has shot past and every 31st. I wonder, how did it go by so fast?
My Mother, when I was chatting to her, said, " remember the world fretting about Y2K?, well, well, we have survived that and so much more!"
2010 was an action packed year for me, well sort of. We visited India, changed apartments, changed state, and are enjoying a family life again ( for 2 years and more, ever since little was 3 months old, M used to travel for work and was home only for the week end, which was the tough on me, but  there IS a silver lining, and I found it,  finally).
The hardest part last year was when my Grandmother passed away. It hurts even now.

On the blogging front, things were definitely slow, but I was happy that I could still manage  posting and trying many new things. Sadly, there are many drafts (pictures with 2010 mark) and I could not get those on the blog. Hopefully, I will pick up my pace this year.

This is my first winter in a state where it snows! I am still excited... really! I have enjoyed watching the snow fall, going out and playing in the snow, taking pictures like the one above, and drinking hot rasam (yes, rasam!) watching the ground getting covered in 'snuu', as my son calls it. 

Last week I was at Sams Club and they had the sweetest Pineapple on sale. I love pineapple but shy from buying it, I feel intimidated by the thought of cutting it and have visions of cutting off my fingers, ewww! 

The lady at the sample counter was very helpful and showed my how to go about slicing  the pineapple and I was happy to pick up a prickly one and happily trundle my cart to check out .

Pineapple Rasam was on my mind for a long time and I was just waiting to try it. The flavors are amazing and I particularly like biting into pineapple bits. if you are like me, try this.
This recipe makes 4 cups
Source: 660 curries


1/4 Cup Toovar Daal (pigeon peas) 
2 Cups Fresh Pineapple cubes ( 1/2 inch cubes)
1 medium Tomato cored and cubed (1/2 inch cubes)
2 tsp. Sambar Masala
11/2 tsp kosher Salt
1/2 tsp Asafetida
10-12 fresh Curry Leaves
4 Tbsp. Fresh Cilantro , chopped (leaves and tender stems)
2 Tbsp. Ghee or Canola oil( I recommend ghee) 
1 tsp Mustard seeds
1 tsp. Cumin seeds
4 Dry Red chilies- stems removed

Wash the daal thoroughly ( 3-4 changes of water) and cook the daal. I use a pressure cooker, you can cook the daal in a saucepan, it is time consuming and needs supervision.

While the daal is cooking, combine pineapple, tomato, sambar masala, salt, asafetida, curry leaves and 2 tbs. of the cilantro in a medium size saucepan. Add 2 cups of water and bring it to a boil over med-high heat. Lower the heat to medium and simmer uncovered, stirring occasionally until the pineapple and tomato have softened but still firm looking ( 10-15 mins)

Once the daal is cooked, transfer the cooked daal to a blender and blend until smooth or if you have an immersion blender, use it to puree the daal.

Heat a small skillet and add ghee /oil. Add the mustard seeds. After the seeds have popped, remove the skillet from the heat and sprinkle in the cumin seeds and chiles. Stir in this spiced ghee mixture into the sweet- tart pineapple-tomato broth and add the pureed daal.

Sprinkle the remaining cilantro and serve.

Notes: This makes a mild rasam, I added extra sambar powder to give it a kick. This may be entirely because of the  ready made  sambar mix ( Iyengar Hot-Hot)I am using, If your sambar masala is strong, go with the recipe and taste before you make any adjustments.
Pin It

Wednesday, December 22, 2010

Classic White Pan Bread

When I was little, we did not have whole wheat bread, multi-grain bread or maybe we did , we were unaware and as far as we knew, everyone went in for the 'regular' kind of bread. It was white bread and Paav.

You either buy a loaf of Wibs or Britannia sliced bread and if you want  paav, you scoot down to the local bakery and buy a slab (called 'laadi') or even individual rolls.  Making bread at home was not even thought of and we did not have an oven. In fact, there was this bhaiyaji who would come to our home and those in the neighborhood on his cycle carrying bags full of fresh baked bread and new laid eggs. He would wrap the bread in newspaper and hand over what we wanted and I would hand over the money ( .25 paise for a paav) he would then jokingly ask me, "baida chahiye kya baby?" (baida meaning egg) and hold an egg in his hand and offer it to me, knowing fully well that we did not eat eggs and cackle when I would shudder!

I would slather the paav / bread slices with Amul butter and dip it in my tea or maybe I'd add a slosh of ketchup or jam and eat it, enjoying every soft bite. 
I never dreamed I'd make bread at home. Well, not successfully that is. Years ago, when I went to a cookery class, the instructor taught us bread, she made it look kinda easy.  By that time, we had purchased an oven at home and my cousin and I were VERY eager to try our hand at making bread. The whole thing is a bit of a blur, but I do remember this, they made excellent paper weights. 
I gave up on baking. At least for the time being. I was down, but not completely out.
I made a couple of attempts after that, with no success. Gave up, yet again.
Then I hit the jack pot......I read the recipe over and over for days, tempted yet I had not the courage. I then attempted and succeeded in making pizza. I had overcome my fear of yeast, in part. This gave me courage to try bread and boy! am I glad I did!!!

Just like the last time, I chewed my nails to zero when the bread was in the oven, this time around as well. But I should have believed. The result was a  perfect loaf! Yaaay! 
I could not keep still, I could hardly stand the wait,  I even 'fanned' the loaf with the oven mitt to cool it faster and sliced it. Look at the picture below and learn from my mistakes. Let the loaf cool. Completely.
Over excitement? Take a deep calming breath, count to 10 and then slice, if you do not do this, the knife shakes and cuts unevenly, see? No harm done to the loaf, just don't look very pretty.

I made this a couple of times and with equal success. My friends shared it with me and  gave me the thumbs up sign. I only wish my parents were here with me to enjoy it. 

Makes: Two - 8 1/2 x 4 1/2x 2 3/4 inch loaves

2 1/2 tsp ( 1 envelope) Active Dry Yeast
2 Cups warm  Water
5 - 5 1/2 Cups All Purpose flour (APF)
1 Tbs. Sugar
1Tbs. Salt
5 Tbs. Unsalted Butter or Vegetable Oil

Whisk the yeast into the warm water and set aside and prepare other ingredients

To mix dough by hand:  place 5 Cups APF, salt and sugar in a mixing bowl and stir in yeast mix and melted butter

Continue to mix until the mix resembles a rough dough

Turn the dough out onto a lightly floured  work surface and knead until the dough is smooth and elastic, about 5 mins. If the dough is too soft and sticky, add flour 1 tbs. at a time.

Place the dough in an oiled bowl and turn to oil all surfaces

Cover the bowl with plastic wrap and allow the dough to rise until doubled in bulk, about 1 hour

Turn the risen dough onto a lightly floured surface (you may need a scraper). Deflate the dough and divide into 2.

To form a loaf, make sure the surface is free of any excess flour, then stretch the dough until it is approximately the length of the pan, then fold in the short ends, then fold in the far long edge over  tot he middle. Fold over the  other long side and  compress to form a tight cylinder 

Place the loaf in the pan, seam side down and cover with plastic wrap. Repeat with second loaf and allow it to rise until double ( about 1 hour) 

When loaves are almost double, set a rack in the middle level of the oven and pre-heat to 400 deg. F

When the loaves have completely risen, place the pans in the oven and bake for 30 mins ot until golden brown and firm and internal temperature is 210 deg.

Unmold  the loaves to a cooling rack  to cool on side.

Cool completely and slice. Enjoy.
Pin It

Sunday, December 19, 2010

Kairi Aamti / Raw Mango Curry

Before I forget and before this year ends, I need to clear the huge backlog in my drafts folder. I have  pictures and references to the recipes or the actual recipes lying in the drafts for nearly 6 months now. I have some recipes I tried in India, took pictures, and well, I left it at that.

Summer seems like a memory, hot, humid, noisy and mangoes. My whirlwind India visit is still fresh in my memory. The joy of  buying raw mango, thinking of a 100 things you want to make with those, finally keeping one aside,  using the rest to make this nectar .

Panha in one hand I  rummaged thru my old bookshelf, my favorite authors, the books I had patiently collected  in my school, college and MBA days. the books I would read when I was eating alone ( which was frequently as I worked in shifts and was at home at all odd hours), books I read when I could not sleep  or books I carried in my purse to read on my way to work. So many memories, so much I gave up.. of all the things I miss from home I miss my books the most. Sure I can go to the library and borrow what I want, but it isn't the same, it's not the same as holding the copy in your hands and lovingly adding it to the shelf, not the same as running a light finger on the spines of the books and trying to pick one. Not the same as smiling  and picking up an old, old copy of a much loved comic book or delighting in classics  or laughing out loud just looking at my collection of P G W 
And there, among the lowest  shelves are a few old books my Mother had kept, these looked different from my collection. And they were! they were my Mother's  knitting books and some cookbooks!  Now I am no knitter so I glanced at them and pounced on the cookbooks. 
She has this Marathi cookbook, 'Suruchi', which I had never really paid attention to before I got married. But now, things are different and I eagerly read the recipes. 

I absolutely LOVED this raw mango curry, couldn't get enough of it!  the taste, the texture in every bite is a delight. A burst of sour with sweet undertones of the jaggery and a hit of red chili powder, tickles the tongue  and  leaves you wanting more.


Recipe source: Suruchi

1 Big Raw Mango / Kairi
1/2 Fresh Coconut (Grated)
1/2 tsp Coriander seeds
1 tsp Mustard seeds (divided)
 7-8 Curry leaves
1/2 tsp Asafetida
 1 tsp Ghee
3/4  tsp Red Chilli Powder 
1/2 tsp Turmeric 
Jaggery lime size (grated)
1/2 tsp Urid dal 
10-12 seeds Methi  / fenugreek seeds
1/2 tsp Wheat flour / Atta 


Peel the raw mango and make medium bite size pieces. Marinate the raw mango pieces with turmeric , red chili powder, jaggery and Salt.

Place the grated coconut, 1/4 tsp mustard and coriander seeds in the mixer and make a paste

Put ghee in the pan and add mustard seeds, curry leaves and asafetida. Add Urid dal when it turns light brown add Methi / fenugreek seeds.

Add 1 cup water


Add marinated raw mango pieces.

When the raw mango pieces become soft add the coconut paste, water (as per the desired consistency )wheat flour / atta -make a slurry if you want , flour +water,  and salt.

Bring it to boil. Serve hot with rice.
Pin It

Tuesday, December 14, 2010

So I decided to rusk it.

When you have parents who work, there is a certain advantage, they both bring home 'khau' ( snacks) on their way home from work. 
My parents worked in V.T (Yes, I still call it that) Fort area and  there were several bakeries, snack shops  and dairies in the vicinity and many famous for a single item, which was usually sold out by evening. 
We were regulars at Pancham Puriwala a humble food joint serving  deep fried heaven on a platter. Or the fabulous Mathura Pedha  and of course a small dingy store which sold baked items, we started out with their crisp and light, flaky and calorie rich khari biscuits and go on to other mouth watering items like  Mawa cake, fruit cake, were regular items in our cookie jars. 
And then came the cake rusk/cake toast. I fell in love with those. I don't remember when exactly I first tasted  cake rusk, but  I do remember the taste and how much I liked it and  also remembered I had not tasted these in 4 years! A few months ago, when I was still living in Los Angeles, my friend Vandana dropped in and  gave a big box of cake rusk for my Son. Well, he did not eat so many, actually, he probably had a couple, umm... one, maybe. M and I devoured the lot! Down to the last crumb. Delish! 
We ate, we liked and we forgot. 


A few days ago, I made Banana nut cake and to own the truth, I was distracted. Too many things going on and some where I knew I should have stopped, but  the oven was pre-heating and I decided to go ahead.
To cut a long story short, I made some mistakes, no idea what - multi tasking when baking = bad idea = mistakes, but the cake turned out dense and could have done with a tad bit of extra sugar. I was disappointed, I was so looking forward to handing over a warm, soft slice to S and watching his smile as he ate it. 
Oh well, that bombed :(
As the cake sat cooling on the rack, the image of  cake rusk came floating on my mind and I decided to risk it!  I mean, rusk it!
The oven was still hot and the pizza stone was inside. I quickly sliced the cake and placed the slices on the pizza stone and baked them for about 10 minutes ( turning once) until golden brown. Cooled them and store in airtight container.

Verdict: YES!! loved it :) this does taste like the regular cake rusk/ toast you can buy at the Indian store for  $5 or $7, but so much better and cheaper when you make at home  ( even if you bungle it up!)

Try this with eggless banana bread  and you cannot go wrong.

Just to round it up nicely:

Bake Banana cake/bread using the above linked recipes or any cake recipe of your choice.

Cool the cake completely

Cut into 1/2 inch thick slices

Place the slices on a hot (pre heated) pizza stone or if you do not have one, line a  oven safe tray with  foil / parchment paper and place the slices in a row and bake for about 10 minutes, turning once so as to bake both sides. 10 minutes is not the exact timing, use it as a guideline only, keep an eye on those slices ! 

Remove from oven once they are golden brown on both sides

Cool completely and store in an air tight container 

Pin It

Monday, November 29, 2010

Pizza at home! Conquering the 'yeastophobia'!

Does anyone remember (or have you been a part ) of the time when 'Pizza' was a very rare (if at all) treat? It was, when I was in my tweens.  We rarely ate pizza and never made at home, that is if you do not count buying Monginis base.
I would look at the small  ready to eat pizzas at the bakery and wonder why a sandwich, a round one at that, was left open and would *anyone* - *ever* want to buy something that looked so cold and (pardon me for saying this) ugly.
I don't remember the first time I ate pizza, but I do remember that I loved it! And then I was addicted, I could have eaten pizza everyday for every meal.
Pizza at home was a big affair, believe me, when I say this, not because of the effort involved- which was minimal, but because we were 'making pizza at home' the very idea and  a snack so 'foreign' in our totally Indian kitchen with it's usual, pohe, upma, idli-dosa and the likes.
We did not, for many years, have an oven ( does anyone remember these?) at home and  baking was out of the question, it was best left to Monginis and the like.
So, when we did make pizza, we hopped out to the nearest  Monginis or the grocery store and bought ready made pizza base the sauce and the cheese ( sometimes just cheese cubes, we did not really bother about mozzarella or cheddar or any type, indeed , I hardly knew about the different types! ) and used the good old 'tawa' to make and bake the pizza.
I used to help my Mother with the prep work and assembly and watch keenly, every nerve tingling in anticipation of the feast. I would gingerly lift the pizza  corner with a wooden spatula to check how evenly brown the base was getting and  wonder at the melting cheese. So different from what it is today, where one can walk into a pizza parlor and buy an entire pie or slice and not think twice or wonder and anticipate and enjoy every bite .
But over the years, I have grown weary of store bought pizza and have always wanted to re-create the magic at home, to once again feel the thrill I used to as a child. I wondered if I was capable of such enthusiasm now.
 For all those who have lately started reading this blog, I want to admit, I was afraid, *very* afraid of yeast and making breads. In my opinion, there was nothing as daunting as baking breads, for all the simple list of ingredients, I shied away from making pizza base at home, I would willingly walk a mile in tight shoes, but not bake. Yes, that about sums up my phobia! 
Then one day, the blogger in me reared  her head and demanded that I drop my cowardly attitude and swap it for the yeast packet and APF (all purpose flour) and use them up. What, if at worst can happen? a disaster, pshaw! so what, there is a large trash bin, dump it and move on....  Made sense. 
I popped in at the library and after a lot of pondering ( and finally using the 'in-pin-safety-pin' method) settled for this book on 'How To Bake'.
Leafing through the book I realized, I had picked the best book, for a person like me, who had limited knowledge and a lot of fear to deal with. The book outlines simple steps for making basic pizza dough and clear instructions. 
I bookmarked this dough and basic White Bread ( recipe to follow) as my favorites.
The Pizza base was *awesome*! It worked, I watched the flour yield to the kneading, I watched it rise, reducing my nails to shreds and listening to a drumming in my ear (which in a calmer moment I  realized was my heart) . I put it in the oven and watched it bake, yes, I did, I placed a small step stool in front of the oven and parked myself in front watching like a hawk. And boy! was I rewarded!  I sliced it up and gave M the first slice.... the  drumming was louder now, as he took his first bite and then the next and the next and gave me the thumbs up sign! I DID IT!  I MADE PIZZA AT HOME! I felt a rush of the thrill I had felt long ago. I was happy and this was a feast.

Here's how I made the Home Style  Pizza Dough: (Makes 1 - 101/2 x 15 1/2 inch Pizza)

2 1/2 Cups Unbleached All Purpose Flour ( APF)
1tsp. Salt
1 Cup Warm tap Water
21/2 tsp. or 1 envelope Active Dry Yeast
3 Tbsp. Olive Oil

Stir the flour and salt in a 2 quart mixing bowl to combine and make a well in the center

Measure the water and pour onto a small bowl, whisk in the  yeast and 2 T Olive Oil

Pour the liquid mixture into the well  in the flour and stir with a rubber spatula, until a soft sticky dough forms
Beat the dough for a minute until it looks  smoother, cover the bowl tightly with plastic wrap  and allow the dough to rise doubled in bulk (about 1 hour)

Grease the jelly-roll pan  with the remaining  Tbsp. of Oil. Without stirring or folding the dough, use the rubber spatula to scrape it from the bowl into the oiled pan. Oil your hands and press, pull and pat the dough into the pan. If it resists, let it rest for 5 mins. and then continue. Let the dough  rise for 30 mins or until it puffs slightly

Prepare topping of choice ( I used a ready made sauce from Trader Joe's, red and green bell pepper and red onions and mozzarella cheese)

Set rack at the lowest and highest level of the oven and preheat at 450 F

Bake the pizza  on the bottom rack for 25-30 minutes 

(After about 10 minutes, lift the end with a spatula and check that the bottom is not burning, if it is  coloring too quickly, slide a pan under the first one.)

Remove the pizza, slice and enjoy! 

* Notes: 
I used a fork to poke small holes ( do not stab at the dough)  in the pizza dough, this is not a part of the chef's recipe, it is my own
I baked the pizza on a pizza stone. I ensured that the stone was heated through and this takes a great deal longer than the normal pre- heating, I'd say about 25 minutes or more. The end result is a crisp and amazing base! 
Pin It

Tuesday, November 16, 2010

Kuch khatta, kuch meetha- Anaras Ambol

I am back after what seems to me, a very long break and more importantly a self imposed break. I have been busy, packing. yes, yes, packing once again, only this time it was on a larger scale, we were moving out of California. It was a sudden decision, well almost. I could not bear the thought of M traveling through the harsh winter or getting stuck  in IL, unable to travel home for weeks, months ( ok, I am going overboard here) or worse, driving to  the airport thru snow at breakneck speed so as not to miss his Los Angeles flight.  these horrid thoughts kept haunting me  and so finally we decided that we had to move. Barring a small hitch because of the office policy things went smoothly in the small time we had, 2 weeks. We donated some stuff, packed and shipped some, discarded a lot and moved, bag, baggage and baccha ( meaning- child) to Illinois. 
It was a  sentimental moment for us to leave the city  that was home for well over 4 years, a city where we first came to in the USA and had come to love , a city where our son was born.  All I can say now is, Thank God, we had very little time to  move, kept me so busy that I had very little time to get sentimental.
At times like these friends are invaluable! Mrudul and Binaifer, Thank you with all my heart, for all the support and help you guys gave me! For leaving behind all your chores to help me pack, Mrudul, for  doctoring my sprained back ( oh yes! I did that! sprained my back and still suffering), taking care of S (feeding him lunch, making laddus for him!) ,waking up at dawn to make me a cup of tea and  breakfast. Bini, for walking all the way to my home, for taking care of S when I was busy with  all that I had to do, helping me pack and putting them in my car, you guys are the best! 


Prajakta, you and your energy are inspiring! Thank you for coming in  on the eve of our departure and helping me sort, pack and trash all that was needed! 

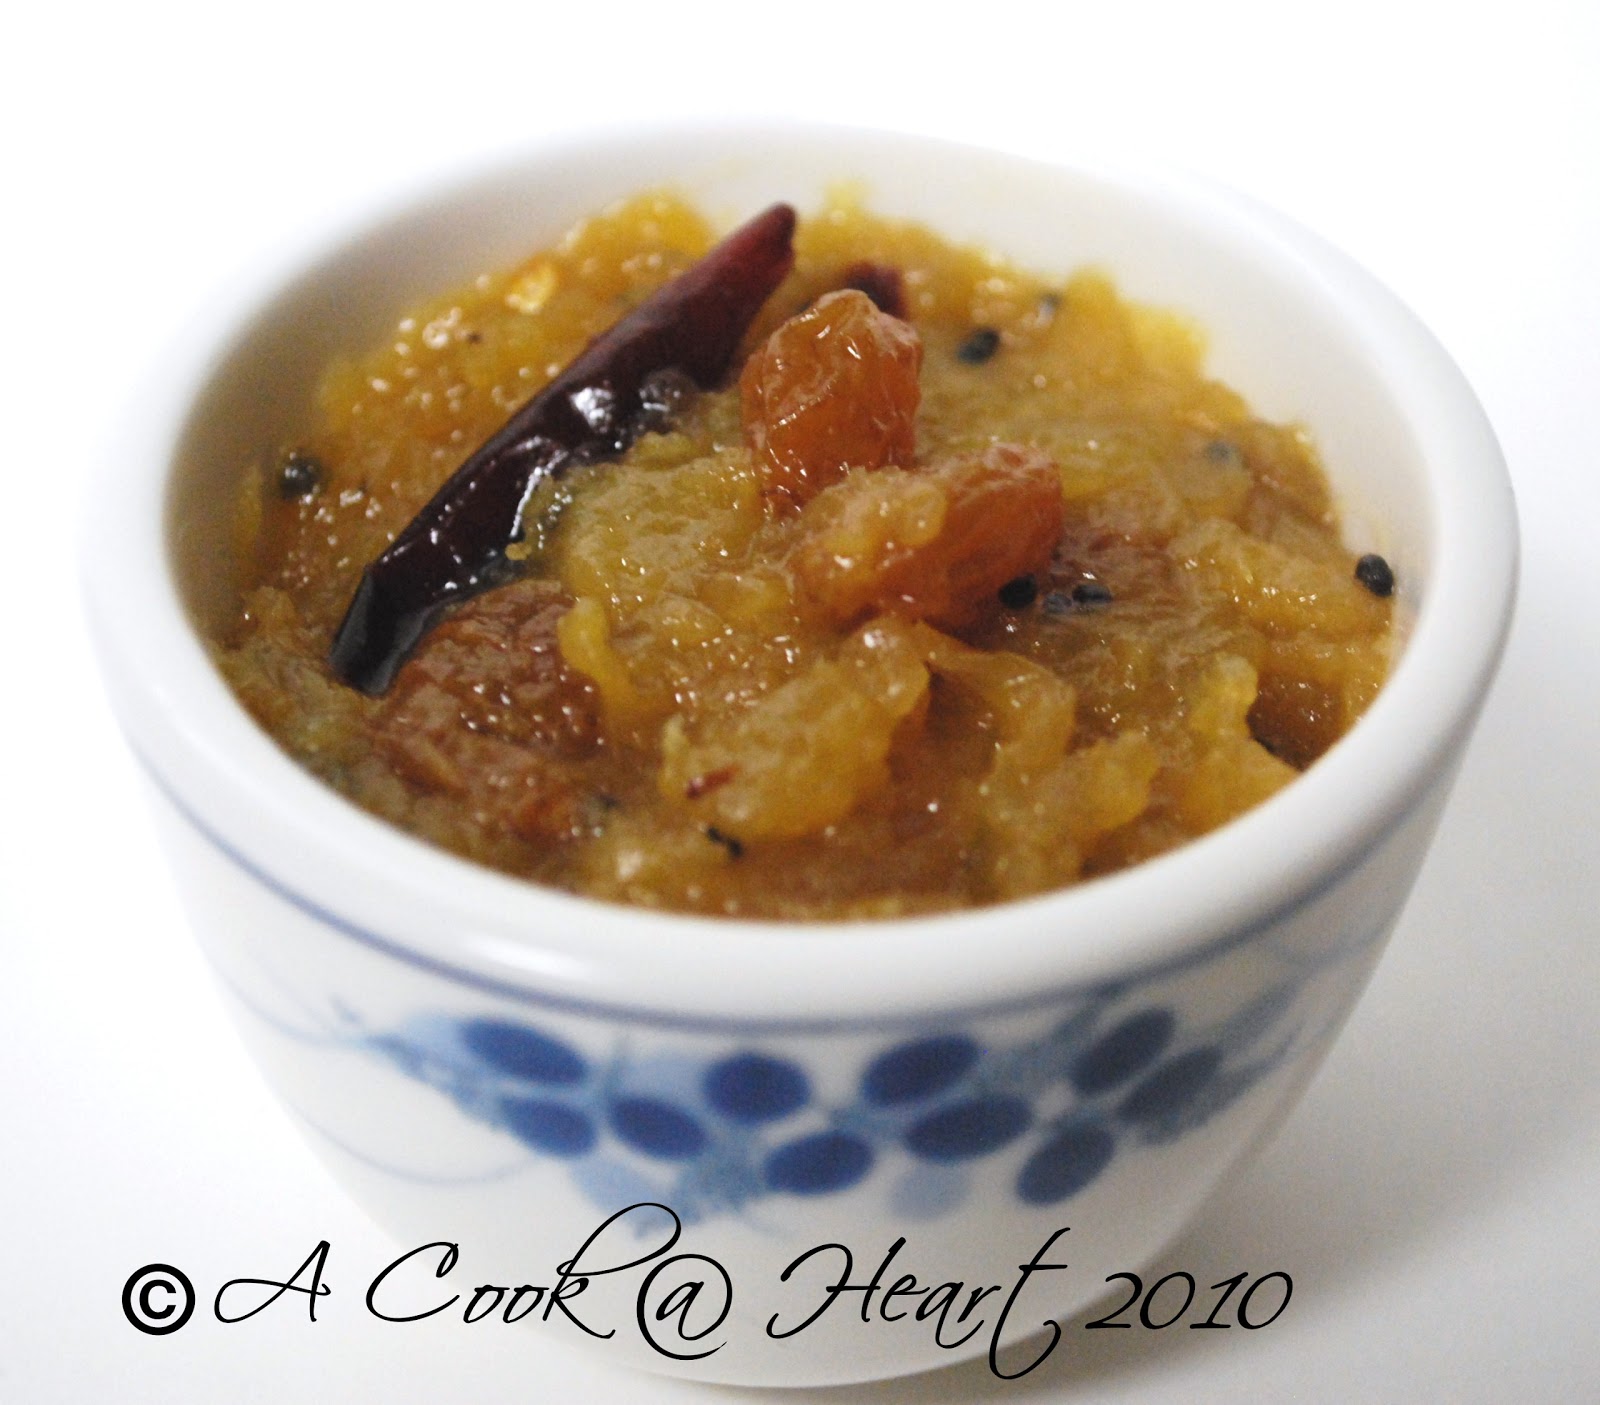
This sweet and sour ambol is for you all, for being the sweet part of my life!

Source: 660 curries
Serves 8

2 Tbs Canola Oil
1 tsp. Mustard Seeds
2 cups Fresh cubed Pineapple
1/2 cup Golden Raisins
6-8 Dry Red Chiles
1/2 cup crumbled Jaggery or firmly packed brown sugar
1/4 tsp Sea Salt

Heat oil over medium high
Add Mustard seeds, after they pop add pineapple chunks, raisins and red chiles
Reduce heat to medium and cook uncovered, stirring occasionally until raisins are plump and the pineapple is lightly browned, 5-8 mins.
Add jaggery and cook. Stir so it melts, 2-4 mins.
Pour 1 cup water and sprinkle salt 
Cook uncovered, stirring occasionally until sauce turns syrupy thick, 10-15 mins
Serve ASAP or cover and refrigerate for 1 week, re-heat to warm before serving.

*M and I enjoyed this ambol with almost everything, plain daal- rice, yogurt - rice, dosas. Pin It

Wednesday, October 13, 2010

Neetu's Daal

Before I went to India and moved to the new apartment, my afternoons were always full. Our group of 5 would meet everyday for lunch and pool whatever we had and enjoy  the meal,  on one such afternoon , Neetu, my friend and then my neighbor, made this delicious and creamy daal. Hearty and full of rich protein, it pairs well with jeera- rice (cumin scented rice) and even with Indian breads. 
I had to have the recipe. every mouthful was full of flavor and kept me asking for more. Neetu gave me the recipe and warned me, she cooks with 'andaaz'( eyeballs ingredients) and just does not like using tsps. and tbsps.! Not willing to give up, I badgered her into giving me the closest measurements and the resultant daal is just as delicious, creamy and hearty. 


1 cup Black Whole Urad Daal 
1/2 Cup  Rajma / Kidney Beans
1 inch Ginger
3 cloves Garlic
2-3 Green chilies
1/2 tsp. Kasuri Methi
1 tsp Cumin
1 stick  (1 inch) Cinnamon
2-3 Cloves
Pinch Aafetida
2-3 Roma Tomatoes
1/2 tsp. Red chilli powder
1/2 tsp Garam Masala
1 tsp Butter
1 tsp Amchur powder
1/2 Onion , finely chopped
2tbs Cilantro, finely chopped to garnish

Wash and soak the  urad daal and rajma in water for  at least 2 hours 
Throw the water ( in which the lentils/ daal  and rajma was soaked)  and in a saucepan, add water, daal - rajma and turmeric and green chiles and boil until  the daal is soft

Crush the cinnamon and cloves using a mortar- pestle or zap it in the coffee mill
Heat oil, add cumin,after it sizzles, add asafetida, cinnamon-clove powder, ginger- garlic and sautĂ©, then add onion and cook until translucent, add tomato, red chilli powder, garam masala, amchur powder, kasuri methi
 Pour this seasoning over the cooked and softened  lentil-bean mixture
Simmer for about 10 mins and let the flavors mingle
Before serving add a pat of butter and garnish with chopped Cilantro
Pin It
Share

LinkWithin

Related Posts Plugin for WordPress, Blogger...
Page copy protected against web site content infringement by Copyscape