Thursday, September 14, 2017

Pullikachal (Tamarind Sauce for Rice) Instant Pot / Electric Pressure Cooker recipe

Many years ago, a cousin told me about MTR Puliogare powder and raved about it. We got a packet and used it and liked it. It was a novelty for us, the tangy taste was unlike any we had tasted before.

The powder was also very convenient to have on hand. 
I used to work in shifts, I would come home at all odd hours and sometimes, starving. When the work load was heavy, we would miss meals to cover up the workload. 
On those days I would come home, in the middle of the night, hungry and dead tired. My parents would be fast asleep and I did not want to wake them, I would quietly go to the kitchen and make myself some Puliogare rice with the left over rice my Mother would keep for me. 

After marriage, M introduced me to a particular brand (I forgot the name) that came in a bottle in the paste form, which was better then MTR and we would enjoy mixing it with plain rice.

When we moved to the USA, we switched back to MTR. We tried other brands (paste) but did not like any.
I searched for a recipe on other blogs.
I found and tried some recipes but nothing clicked. The process was also tedious. 
I dropped the idea for a while and went back to store brought mix.

And then, I saw a recipe which made the whole process simple, made using the Electric Pressure Cooker / Instant Pot.
This solved my problem of baby sitting the  whole thing. 
I used the timings as specified by a FB user Lavanya but modified the spice proportions to my taste.
Spices to be powdered and added to the pulp


To make the spice powder you need:

1/4 cup Coriander Seeds 
1/4 cup Chana Daal
1 tsp. Fenugreek seeds
    1/4 cup Sesame seeds
    8-10 Dry Red chilies ( I used Byadgi variety)
    Few curry leaves ( I used about 2- 3 sprigs)

Dry roast each item separately until the dals are golden brown and the chilies and curry leaves are dry and crisp.
This can be done in the EPC/ IP as well on saute mode. But I used my stove top for this.
Cool completely and grind to a fine powder. I used my coffee mill for this.

To make the Pullikachal / Puliogare paste you need:

One small packet of Tamarind (easily available in any Indian store)
Gingelly (sesame) Oil
1 tbs Mustard Seeds
3-4 Dry Red Chilies ( I used Byadgi)
Few curry leaves
1 tbsp chana Daal
1 tbsp Urad daal
1 tsp Turmeric powder
1/4 cup Peanuts
1/4 cup Cashew nuts (optional, but I like them)
Salt to taste
1 tsp Asafetida powder
2 tsp Jaggery crumbled ( this is my choice, the original recipe does not call for it)

Soak the tamarind in warm water and squeeze out the pulp. Discard the solids.

Start the EPC/ IP on Sear / saute Mode. 

Add Gingelly oil, generously. I added as much as needed to make a thin layer covering the entire surface of the cooker inner pot.

Once the oil heats up add the urad daal and chana daal and mustard seeds . 

As they pop add the daals turn golden brown, add the (raw) peanuts and saute till golden. If you use roasted  peanuts add cashew pieces along with the peanuts. Add the curry leaves, red chilies. Saute till the oil has coated all the spices.

Add the tamarind pulp and mix everything well.

Cancel the Sear Mode at this point.

Switch to Slow Cook mode and set it for 3 hours. Close the lid and leave the 'whistle' on Vent mode.

Forget about it for 1 hour and 45 mins. 

After that time, open the lid and you will see the liquid has reduced by half or more. 

Now add in the turmeric powder, salt and the ground spice powder. Mix well to incorporate the spice powder very well with the tamarind. If you opt to add jaggery, add it now. 

Close the lid again and let it slow cook for the remaining time on the timer.

At the end of the cooking time the oil will separate from the mixture. 

Puliogare /Pullikachal is ready.


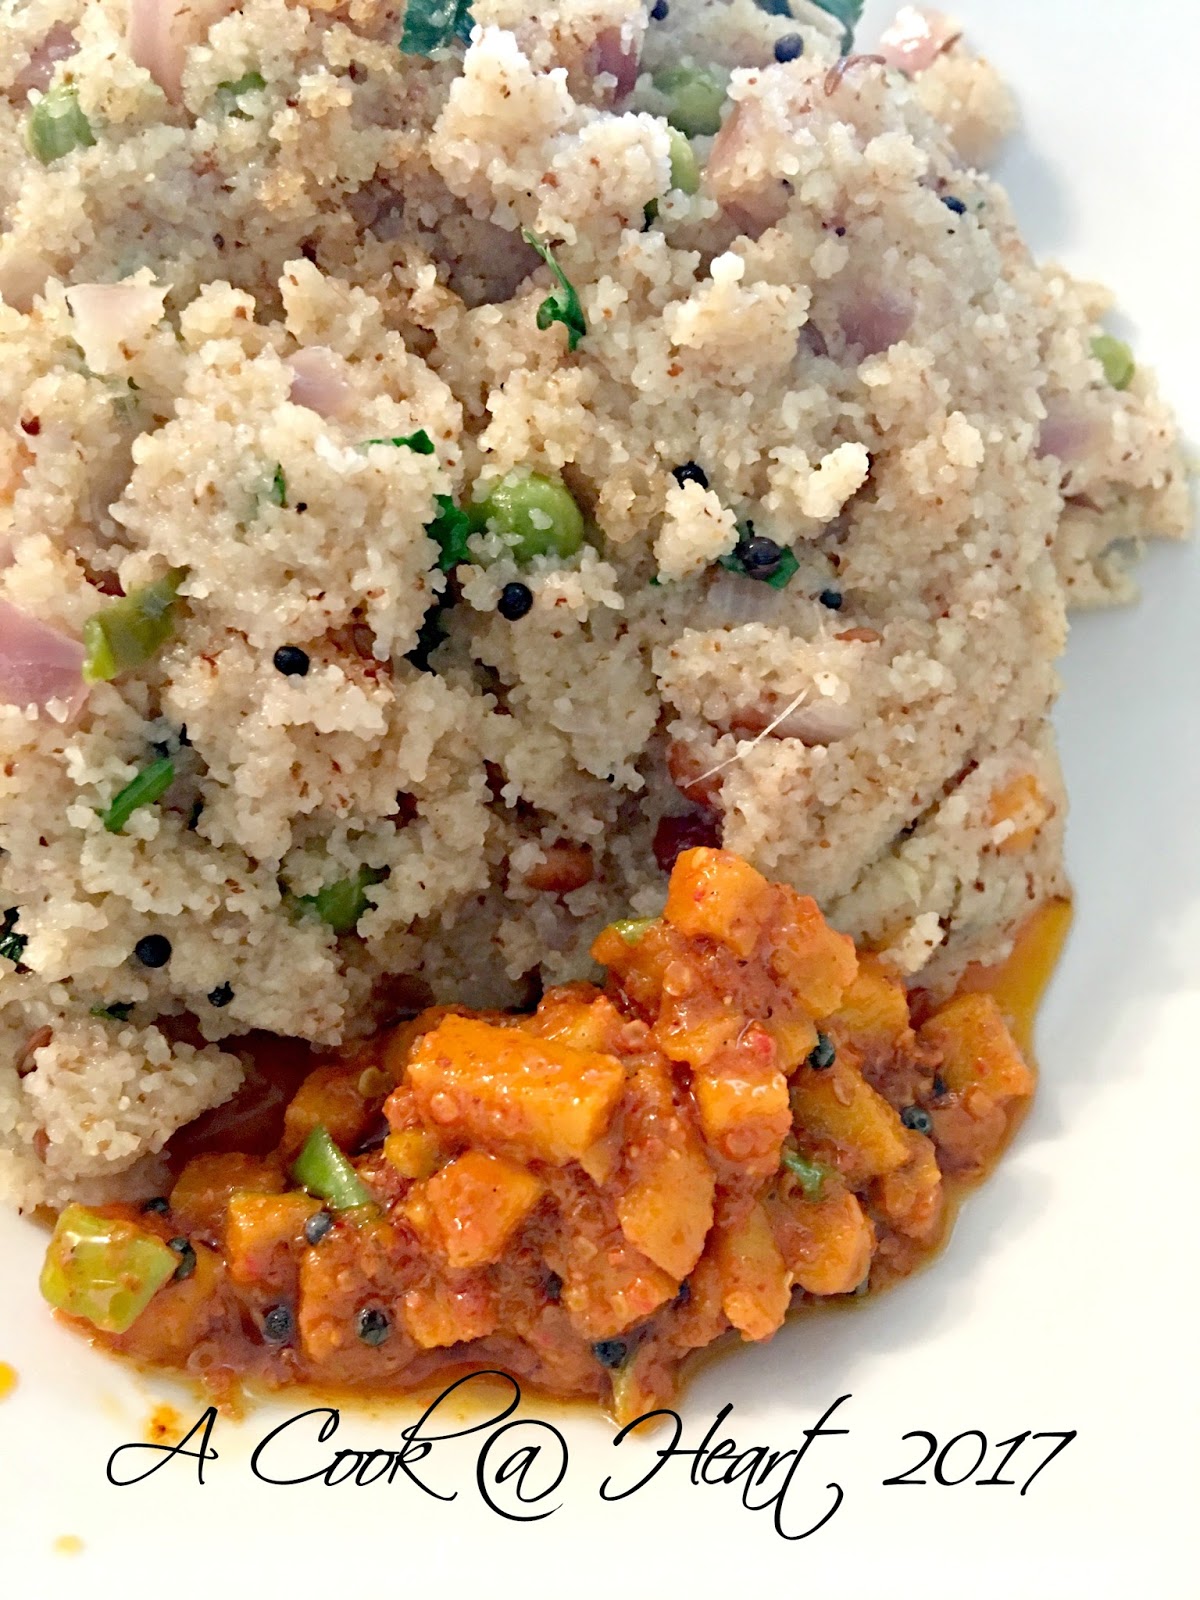
To make Tamarind Rice:

Add a dollop of the Puliogare / Pulikachal paste to cooked and cooled rice. This depends on your taste buds, adjust the spoonful to how strong you want to make it.

Mix it well and serve. 

As simple as that!

This is a life saver on Monday mornings, I can tell you.


Notes:
  • Do not skimp the oil
  • Use Gingelly / sesame oil, it imparts a special flavor
  • Store the Pulikachal paste in a dry airtight container
  • Use a dry spoon every time you make Tamarind rice
  • The addition of jaggery is my choice, just to balance out the extreme tartness.
  • Unconventional as it is,  I had also added 2 tbsp. Sambar Podi to this mix, when I made a fresh batch.


Pin It

Wednesday, May 10, 2017

Kofta Curry (IP recipe) Bottle Gourd & Zuchhini dumplings in a rich and aromatic Gravy.

How do you all plan a menu for guests? Do you make multiple dishes? Like 2 gravy based vegetables, 2 dry, roti and puri, pulav and dessert to follow.
Or, do you plan a simple and manageable menu?

I am the latter type. I plan a manageable list of things I can cook without getting frazzled. IMHO, I also like to keep it simple because too many items on the menu may mean that the guest may not be able to do justice to it all or not sample something at all. 
It all ends up in too many leftovers which, honestly, no one likes to eat again. 

There was also another discussion, on a FB Food group, where a member asked how we plan a menu. By cuisine, she meant.
When I thought about it, I found myself thinking, if I have guests from the North of India, or East or even from Maharashtra, I go ahead and plan a South Indian menu. 
And a North Indian menu is of course welcomed by almost everyone.

Do you step out of your comfort zone and try something new? 
Contrary to what I have been taught, namely, 'when you have guests, make what you are confident about, this is not time to experiment', I go right ahead and try something new. 
How do you plan a menu for your guests? Please share your tips and tricks, I'd love to hear from you.

A few weeks ago, we invited M's friend and his family for dinner. I made this kofta curry and our guests loved it. 
The best part is, it was an easy curry to make! These days I find myself reaching out for my #EPC (Electric Pressure Cooker) all the time. To those of you who use either #InstantPot or a similar EPC will know exactly what I mean. I start my day with setting up my Tea, before I drop off S to school and come home to a perfectly brewed cuppa.
Or , set the EPC to cook a batch of Pav Bhaji as I drop him off to Taekwondo and pick up something from the grocery store that I forgot over the weekend.
Let us however get back to this kofta curry. 

To make the Koftas:
I used this recipe from an old post.
The variation was that I added 1 zucchini to the bottle gourd and used my appe pan / abelskiver pan to sallow fry them instead of deep frying.

Important: * Grate the zucchini and bottle gourd, sprinkle a little salt and let it sit for 15 mins or so. The salt will draw out the excess water from the vegetables. Squeeze it all out and then use the grated vegetables.
Failure to do this will only make the fritter kofta batter runny and will not taste good. 

Shredded Bottle Gourd (Lauki/ Dudhi) and Zuchhini

Using the Appe Pan / Abelskiver Pan to make the koftas

These koftas freeze very well.


I found this gravy recipe here. I modified it slightly to suit my requirement and also based on what I had in my pantry.

Here is how I made the gravy:

6-7 Tomatoes, chopped
1 large Onion ( I used Red Onion), Chopped 
8 fat cloves of Garlic ( if you have smaller cloves, use about 12), peeled
1 inch Ginger, peeled and sliced
1 stick Butter
Fistful Cashew nuts
2 Tbsp. Kashmiri Red chilies powder 
Alternatively, add 1 Tbsp Kashmiri red chilies powder and 1 tsp Regular (hot) chilies powder for a spicier gravy
1 scant tsp Turmeric powder
1 heaped Tbsp Sugar ( I used granulated white sugar) 
2 Tbsp Kasuri Methi ( dry Fenugreek leaves)
Salt to taste
1/2 cup Water


The Spice Pouch
 Spice Pouch:
1 x 1 inch Cinnamon stick
1 tsp Cardamom (green)
1 number, Black Cardamom (Badi Elaichi)
1 tsp Cloves / Laung / Lavang
1 Star Anise

To Begin:
 Prepare the spice pouch. I used the pouch shown in the picture, it is the 'water filter' pouch one easily gets in India. Alternatively, use cheesecloth (cut it into a square, layer 2-4 square pieces on top of one another) place the spices on the cheesecloth and pull the sides closed and secure with a piece of string. The spices should not spill out. Set aside.

To the inner steel pot of your Electric Pressure Cooker / Instant Pot add
The peeled and chopped onion, just big pieces.
Chop the tomato (quarters). Pitch them in.
Add all the ingredients listed under the gravy list ( from tomato to Water)
Add the spice pouch
Close the cooker and seal the lid ('whistle' set to Sealing mode)
Use the 'Manual' mode and set it for 15 minutes.
Let the cycle complete and the pressure release naturally (NPR)
Open the lid, carefully remove the 'spice pouch'
Using an *immersion blender, blend the gravy till smooth
Add the kotas to the gravy
Switch to the Sear / Saute mode and let the gravy come to a gentle boil and the koftas absorb the gravy.

*If you do not have an immersion blender, let the gravy cool and then blend it in the regular blender till smooth. Transfer the blended gravy to the steel inner pot, you can later add the koftas to it and heat the gravy to let the koftas absorb all the flavor on the 'Sear' / 'Saute' Mode

Garnish with chopped cilantro and a swirl of cream if you wish to. 


NOTES:

- Instead of koftas, add cubed Paneer to the gravy ( Paneer Butter Masala)
- The original recipe calls for Honey, I used sugar instead and used just 1 tbsp. If you like sweetness to the gravy, use more. 
- The original recipe calls for milk to be added to the gravy with the other ingredients, I did not. The cashews did a great job of adding richness to the gravy and I was very happy with just that.
- Use Kashmiri red chilies powder for a deeper red colored gravy. I had the spicy variety on hand and so had to use half the quantity.
- The gravy freezes well, as do the koftas. Just make sure that they are frozen separately. Thaw the gravy  and koftas in the fridge overnight and then heat them (medium-high heat) together. 
Pin It

Tuesday, April 25, 2017

Black Bean Burger

It was my birthday and I had also secured my admission in B School or was it my first job? I don't remember... 
It was something to celebrate about. My mother was with me and we went to MacDonalds, in Bandra, they had just opened that branch. Mumbai had been introduced to this chain very recently and it was very crowded, but we wanted to taste the 'famous burger'.
For the first time that I tasted the Veggie burger, I liked it. It was different. Different from the 'masala' cutlets that were used in local fast food joints. 
To my mind, however, a burger patty was made up of potato and some veggies. It was only later, that I was introduced to variations.
Pinterest is a great resource for recipes. I was interested in a recipe which was my kind of vegetarian, which meant without egg. 
 I found this recipe and modified it to suit our taste.This made 6 patties.

To make the patties:

1 cup Black beans soaked in plenty of water (left overnight). 
Cook the black beans. I used my Electric Pressure Cooker (beans setting)
Drain the liquid after the beans are cooked and mash the beans using a fork or potato masher. 

Black Beans mashed
1 Boiled Potato, mashed 
approx. 3/4 cup Corn (I used frozen)
2 slices of bread crumbled, alternatively, soak the bread in water and squeeze the liquid out and use
1/2 Onion, finely chopped
4 fat cloves of Garlic
3-4 squirts of Tomato Ketchup ( I eyeballed this)
3-4 tbsp Soy Sauce ( I eyeballed this)
4 Tbsp Sriracha Sauce ( Reduce it if you cannot tolerate the heat)
Salt to taste (be careful, the ketchup and sauces contain salt, taste and add)
2 heaped tsp. Roasted Cumin seed powder
A small fistful Cilantro with tender stalks, finely chopped
1/2 tsp Black Pepper powder
1/2 tsp. Cayenne powder
Oil

Onion slices
Tomato slices
Lettuce leaves (I skipped these)
Cheese Slices
Sauce of your choice for the buns ( I used 1000 Island, other choices are: Ranch, Mayo,Sriracha, any sauce of your preference)
Burger buns

Heat a small fry pan and add 2 T oil. Once the oil is hot, add the chopped Onions and saute till they turn brown at the edges. Add the chopped garlic and cook till, both the onion and garlic are well cooked. Cool.

Thaw the Corn. I used the microwave.

In a mixing bowl, add the mashed beans, the onion and garlic, mashed potato, corn and all the spices and condiments. Add the bread crumbs and mix the whole thing well. Taste and check the flavors.
Adjust if needed.

At this point, I placed the mixture in the fridge.

While the mixture cools, slice the onion and tomato into rings. 

To make the burgers, heat a griddle. place a patty on the griddle and drizzle some oil around the sides and cook on both sides till golden brown.

Butter the burger buns on the inner side and toast till golden brown (on one side only).

To assemble and serve, smear the sauce of your choice on the bottom bun. Place the patty on the bun, top with a cheese slice, onion rings, tomato slices, lettuce leaves and place the bun on top.


Notes:

Adjust the spices to your taste in the burger mix. I like mine well seasoned ( a tad spicy, in fact) and make sure I can taste the patty through the bread, cheese, tomato etc.

These Patties freeze well.

Pin It

Tuesday, April 18, 2017

Volcano Cake (how did I forget this!?)

I am getting old and forgetful.
I am.
OR how else can I possibly have forgotten to post about this cake?
I made this cake for my son's 8th. Birthday, last year.
We planned and discussed it in great detail.
We kept it under wraps, a surprise for our guests!

Last year S wanted a Volcano Cake. The idea had a firm grip on our minds and we could not think beyond it.
He wanted a chocolate overload.
I agreed.
The cake was chocolate, with chocolate filling and ganache frosting. If that isn't an overload, I don't know what is!

There are tutorials on YouTube for making volcano cake. I looked at all those and finally made mine.
For the Ganache, here are some links for you to follow
Ganache 101 (Martha Stewart)
Natasha's Kitchen
Milk Chocolate Ganache ( I am Baker)
White Chocolate Ganache

For the cake, I made
1 x 10 inch cake as the base
4 x 6 inch cakes for the mountain
Milk chocolate ganache to use as a filling and Dark chocolate ganache to frost the cake.
White chocolate ganache to make the 'lava'.

You will also need:

  • A cake board
  • Decorations ( trees and mini dinosaurs etc.)
  • One small plastic/ glass cup to fit into the mouth of the mountain (I used a tea light holder)
  • Dry Ice (Handling and Storing Dry Ice)
  • Tongs 
  • Water
  • Sharp serrated knife ( to trim the cake)
  • [OPTIONAL] Cookie Cutter: round ( to make the 'mouth' of the volcano, size similar to the cup you plan on using). If you don't have a cookie cutter, use the knife.
  • 1/2- 3/4 cup white butter cream or whipped cream frosting (colored green to make grass at the mountain base)

To begin : Prepare the ganache. This can be made a few days in advance and stored in airtight containers in the fridge.

To prep the cake:
Chill the prepared cakes in the fridge
If you like, you can fill the large cake with frosting, slice the cake in to 2, horizontally and spread ganache between the layers and chill in the fridge.
You can also do the same with the smaller cakes.

The frosting between the layers can be different. Some options are:

  • Nutella
  • Ganache
  • Whipped cream (you can use store brought Cool Whip )
  • Butter cream frosting (vanilla or chocolate)

While the cakes are chilling, prepare the 'lava' using white chocolate ganache and color it. Set aside.

To begin, put a dab of frosting on the cake board and place the 10 inch cake on it.

Frost it using the prepared Ganache

On a baking sheet or tray, layer the 6 inch cakes one on top of the other gluing each cake with the help of ganache to the other.

Cut a small circle using the cookie cutter or knife on 2 of the top layer cake. the circle should be the size of  the cup you will place inside it to hold the dry ice. Frost around the circle so the crumbs do not go everywhere.

Trim them using a sharp serrated knife to make a mountain shape. Keep it a bit rough, like a mountain is, you do not need to be perfect.

Crumb coat the cake with a thin layer of ganache to seal in all the crumbs and chill for about 30 mins.

Now apply a generous layer of ganache on the mountain and spread it as evenly as possible on the surface to cover every inch. Smooth the cake gently, since there are a few uneven surfaces, be careful, you want to preserve the 'rocky' look.

Spoon some 'red lava' ganache in tot he circle that you have cut out and then drizzle some over the sides to mimic lava pouring out.

Gently place the plastic cup/ tea light holder into the cavity and press it down very gently so that it is snug and does not show up on top.

Fill a  frosting bag with the green icing and fit it with a Wilton tip 233 (Grass tip).
Pipe grass all around the base (on the 10 inch cake) and then use any accessories you want. Pipe some grass around the accessories to hide the flat base.

If you plan to use any figurines ( action figures or mini dinosaurs, dab a spot of ganache to the bottom of the figures, on their feet and stick them on the cake board or on the cake).


From left to right : Tea light holder to place dry ice, dry ice in the cup,  pour water gently on the dry ice to make it smoke


Before you cut the cake:

Chill the cake in the fridge. If it's an outdoor party, the cake will come to room temperature by the time you cut it.

To make the volcano erupt, using a pair of tongs, carefully place a couple of pieces of dry ice in the plastic/tea light holder in the mountain.

Make sure that you do not touch the dry ice. It is also a good idea to make sure that there are no kids around you at this time. Curiosity can be a terrible thing in this case. you don't want any child getting burns and upsetting the entire party.

To make the volcano smoke, pour water gently on the dry ice and it will immediately start 'erupting'! 
It is just so much fun to watch the children and adults enjoying this volcanic eruption! 

My son loved the attention his cake got and he made sure that everyone understood that the cake idea was his and he told me exactly what he wanted! 


Enjoy the applause and the cake! 


We are now working on this years cake! Stay tuned.


Pin It

Monday, April 17, 2017

Pickle, Granny Smith Apple Pickle!


Isn't it beautiful outside? It's green everywhere, well, almost.
There are days when it's cold with the occasional snow, making me huddle indoors and turn on the heater. And there are days when I wear a jacket and step out only to cast it aside. 
As I pull warm throw around me and look out, I see these beautiful blooms and I feel cheerful. 

I was talking to my Mother and she told me that Mumbai is reeling under warm temperatures. While it is tortuous to go out, the fruit vendors have piles of raw mango as well as ripe mangoes to sell. 
She and my father miss me in summer, I am a big huge fan of mangoes (raw and ripe) and love me some pickle and aamras (ripe mango pulp). 
When my Mother gets talking of pickles, I yearn for some. I absolutely love pickles!
Unfortunately, every time I pick up a raw mango, it just looks like it's raw, but inside the fruit is sweet.
While I enjoy the sweet fruit, it still does not serve the purpose of making a pickle. 
And then, I saw this post and knew I had to make it. 

I am however a big fan of shortcuts and like instant results.
My version of this pickle is another shortcut on the one I have linked above.


To make Green ( Granny Smith) Apple Pickle you need:

2 Granny Smith Apples
Instant Mango Pickle mix ( easily available in any Indian store, I used K-Pra brand)
Oil
Salt
1 tsp Mustard Seeds 

Wash a jar (which is airtight) with hot water and dish soap and dry it completely. Any moisture will only mean fungus on the pickle. 
Wash the apples and dry them ( make sure the apples are totally dry). 
Chop the apple into pieces. I used this chopper with the small dice blade. 

Put the chopped pieces in the jar, add salt , 2 heaped Tbsp. Pickle masala and mix thoroughly.
Add Oil (pour enough to cove the apple pieces).


In a small sauce pan, heat about 3 tbsp oil, once hot, add mustard seeds and let them pop. switch off the heat and let the 'tadka' cool down completely.
Once cool, pour it over the pickle and mix.


Your pickle is ready. Serve it immediately or let it sit for a day and the flavors combine. 


NOTES:

  • This pickle needs to be refrigerated
  • I have added only 2 tbsp of the pickle masala, keeping it a tad mild, hoping my son will start liking pickles. You can add a bit more.
  • The left over oil can be reserved for making 'achari' vegetables / pooris.
Pin It

Friday, April 07, 2017

Fuss free Pav Bhaji in the Electric Pressure Cooker / IP

On my last India trip, my son and I had a blast. I formally introduced him to the glorious street food. We loved the dabeli, the pani puri, the vada paav/ samosa, but the jewel in the crown was pav-bhaji.
We went to Achija and he fell in love with it. It was a first for li'll S and it was so satisfying to see my 8 year old eat with great concentration and enjoyment. 
To date, he talks of Achija and his eyes glaze over and the smile says it all.

S also has high expectations.
There are days when I fret..."So, what should I make for dinner?" 
"Oh, just make Pav Bhaji", he says causally. 
I stare, sometimes I exclaim, " Veda ahes ka?", I mean pav bhaji on demand, come on! 
All this changed a few weeks ago. 
Now, If I have the necessary ingredients on hand, I just nod my head and finish the task at hand. 
No hurry.

When I spoke to my friend Sonali, she told me how much she loves her EPC and how useful it is for cooking almost everything.
She told me she was making pav bhaji for dinner and it was such a breeze! 
I loved the idea. Pav bhaji in a jiffy, on demand.
Instant pot pavbhaji


I like how fuss free and no babysitting required this recipe is.

I like to prep just one thing before hand. I soak dry red chilies in warm water for a few hours, this gives the bhaji it's nice color.

To make pav bhaji in the EPC , you need

4-5 Dry red chilies ( preferably Kashmiri or Byadgi) soaked in warm water
6-8  large cloves of Garlic
1 inch ginger scraped and grated
1 small Onion, Finely chopped
1 small or 1/2 of a large sized Green Bell Pepper, finely chopped
1 can diced Tomatoes 
2 cups Cauliflower florets
3 Potatoes ( I used Russet), peel and make large cubes
1/2 cup Green Peas ( I used frozen) 
Salt to Taste
3 heaped spoons ( I used a plastic disposable spoon) Pav Bhaji Masala (I use Everest)
3-4 tbsp. Oil
Butter, big pats! 
Pav
Chopped Cilantro, to garnish
chopped Onion, to serve with bhaji
Lemon wedges, if required.

To begin, drain the water from the soaked red chilies. Place the chilies and 4 cloves of garlic in a chopper / blender jar and pulse to make a rough paste.

Start the EPC on Sear / saute mode and add Oil and one tbsp Butter to the inner steel pot.
As the oil heats and the butter melts, add the red chilies paste, cook this well. IF the chilies are under cooked, they will make the bhaji bitter.
Once the raw smell of the chilies and garlic is gone, add the chopped onions and saute them well. 
When the onions turn brown at the edges add the reserved chopped garlic and grated ginger and saute till the raw smell is cooked out.
Add the chopped bell pepper.  As the bell pepper softens add the remaining ingredients.
Just pile them in the cooker pot and mix.
Cancel the Sear mode. Close the lid and set the 'whistle' to 'Seal' mode and select the Manual Mode and set the timing for 20 minutes. I might have set it to 25, but 20 is fine.

In the meantime, finish a load of laundry or read a book, drop your child off to an activity or pick him/her up, watch TV. Do what you want!

Let the pressure subside naturally (NPR).
Open the lid and use a potato masher to mash the vegetables well.
Serve bhaji with a big pat of butter, chopped cilantro and soft buttery, lightly toasted pav. YUM!

Notes:
- If you do not wish to use the soaked red chilies paste, you can also use Kashmiri Mirch powder instead. It does not need to be sauteed in the beginning. Add it after the bell pepper is cooked.

- Garlic is what will give it the enticing aroma and do not skimp on this. I used large cloves and so 8 were sufficient. If you have medium or small sized cloves, increase the quantity.

- Leftover pavbhaji can be stored int he fridge.


Pin It

Monday, April 03, 2017

(Cornflakes) Chivda for colleagues


As we walked the aisles of the Indian store, I reminded M that he wanted to pick some snacks for his office colleagues. They were interested in trying some popular snacks. 

I was thrilled that M's colleagues wanted to try something and I could not let this opportunity pass without making some home made snacks.We picked out some popular snacks and I also decided to make some chivda and send it with him. 

In the olden days, packets of chivda and ladoo were given at functions. They still are. These were primarily given to those who had traveled distances to attend the function (marriage / thread ceremony etc.) and dry snacks were travel food during the return journey. 

To me, chivda is an 'essential' snack. My favorite Diwali snack is this Indian take on a trail mix. 

This time I wanted to try Corn Flakes Chivda. Though the traditional way is buying 'corn poha' which is deep fried and then seasoned, the easier version is using boxed cereal. Buy the plain one.

I had seen this version first on The Cooker's blog and liked the idea very much. I just played with the proportions to suit our taste.

chivda


The recipe is simplicity itself.

You need:

4-5 cups of Corn Flakes (plain / original) 
4-5 Tbsp Oil
1 tsp EACH, Mustard seeds and Cumin seeds
1/2 tsp Asafetida (Hing)
1 scant tsp. Turmeric powder
1/2 tsp. Kashmiri red chilies powder (optional, just to add some depth to the color)
1 tsp. Roasted Fennel seeds, lightly crushed
2 fresh Green chilies, chopped
Few curry leaves
2 heaped Tbsp EACH, Cashew nuts, Peanuts, Raisins, roasted Gram Daal (dalia)
Salt to taste
1 small pinch Citric acid granules
Sugar to taste

Heat oil in a wide wok / kadhai.
Add in the mustard seeds and as they pop, add the cumin. 
Once the cumin sizzles, add the asafetida and then the cut green chilies and curry leaves.
Be very careful as the moment the chilies and curry leaves touch the hot oil, they sputter and hot oil drops are likely to fly here and there. If you have a spatter guard, use it, if not, just step away from the stove.
Once the chilies and curry leaves turn crisp, add the nuts, raisins and dalia and stir them until they are golden brown and the raisins swell up.
Next add the turmeric powder, red chilies powder (if using), fennel seeds and stir briskly. Be careful that the spices do not burn.
Next add the salt and citric acid granules and mix.
Add the cereal  and mix well, but gently, coating the corn flakes with the spice mix.
Switch off the heat and let the mix cool down a bit.
While it is still just warm, add the sugar and mix well.
Cool and store in an airtight container.
Serve as a tea time snack.

Corn Flakes Chivda, Indian trail mix

NOTES:
  • The measures for a chivda can be approximates, the recipe is very forgiving, except for the citric acid granules, use only a small pinch, no more.
  • Corn flakes can be substituted for plain Cheerios or plain (unsweetened) rice krispies
  • To change the taste a bit, you can also add 1 tsp of lightly crushed coriander seeds (sabut dhania).
  • Adjust the amount of chopped fresh green chilies to suit your level of tolerance. 
  • You can omit the green chilies and just use dry red chilies powder ( use 1/2 tsp, regular chilies powder for a mild taste)
  • Since we are adding Citric acid granules, do add the sugar to balance the sour, spicy and sweet taste.


Pin It

Wednesday, March 29, 2017

DIY : Bath Bombs to relax and refresh (Non-Food Post)


For a few months now, I have been experimenting with Essential Oils (EOs). 
At first I just sniffed tentatively and found the aroma very strong and actually wrinkled my nose at it.
Little did I know that soon I would learn to appreciate their aroma and uses!

These days I use EOs to diffuse, to apply topically, for relaxing in the bath, in food... 
Depending on what oil you use, the oils can help promote feelings of relaxation or have a calming effect or energize

Everyday when I drop and pick S from school, I see teachers on street corners in their crossing guard jackets, helping the itty bitties ( walking, or on scooters or bikes or even skateboards) cross the road safely to reach school. 
It does not matter whether it freezing or icy rain beats down on them, they are there! So, last week was Teacher Appreciation Week in Li'll S's school and I wanted to do something special for them as well  S's class teacher. Ms.M is gentle and kind and made my son feel welcome and at ease in the classroom. Beginning a new school in the middle of the year is very intimidating. I'm grateful that she helped him settle down and that he loves and trusts her.

Coming back to the Essential Oils, there are days when I *really* need something to calm me. Li'll S can drive me crazy within minutes of reaching home. 
The lunch box comes back as it was sent. Number one reason why I lose it! 

Homework, all of one measly page- for the week- is left at school or in the event that it comes home, the incessant whining over it.

Bed time and dragging feet..  

And, " Mumma, I neeeeeed waaater.."  sigh! *just* as I was dropping off...

I *need* something to calm me.

If one child can do so much, can you imagine what a classroom full of 8-9 year old children can do?! 

If anyone deserves to relax or need an energy boost at the end of a long day, it is a teacher. 
A mother or a teacher have one safe haven to unwind and relax, in the bathroom, taking a long and leisurely bath. 
Warm scented water and silence feels like a bit of heaven on earth.
I wanted to give Ms. M this, much deserved energy boost and so decided to make bath bombs. 

I started out by ordering this bath bomb molds

You can use silicone or normal ice cube molds as well.
There are many 'recipes' or 'formulas' for making bath bombs. 
Here is how I made my lot:

I used
1 cup Baking Soda
1/2 cup Epsom Salt
1/2 cup Citric Acid 
1/2 cup Cornstarch
4 Tsp  Organic Coconut Oil 
Few drops of food color
20 drops each, Essential Oil of your choice ( I used Wild Orange and Lavender

First: Mix the dry ingredients  together.

I divided the dry mix into two equal parts.

Now, when it comes to mixing the wet ingredients, be v-e-r-y careful. Add the coconut oil + EO + color very slowly.

The second the wet ingredients mix with the dry, the mixture gets activated and starts fizzing. So use one hand to drop the oil and your other hand to quickly mix it all together.

Hold some of the mix in your hand and squeeze it, if it clumps up, it is ready to be molded.

Working quickly, scoop the mixture into the molds and overfill the halves.

Now carefully bring together the two halves and squeeze together and let the excess mixture fall away.

To un-mold, gently tap the top of the mold and remove the top and then the bottom. Let the bath bombs air dry.

Repeat the steps for the next lot.

Handle these gently, they tend to fall apart easily. I messed up the Lavender one and finally had to send just the Wild Orange ones.


Notes:

When I thought of it, I could have added a few drops of water ( about 1/2 tsp) to help bind the mixture better.

You can add extra essential oil if you want to make it stronger. But be careful, EOs are highly concentrated and can be overwhelming.

I had a severe headache ( sinus related) and I used a Lavender bath bomb and used a 4-5 drops of Peppermint EO in the bath water and then dropped the bomb. I had a relaxing bath and eased some of the pain and opened up my nose. I also felt pleasantly drowsy and actually napped for an hour!

Disclaimer: I am not an agent / wellness advocate and do not sell anything, these oils are my personal stock and I am sharing what I like about them and what has worked for me.

Pin It

Monday, March 20, 2017

Teacher Appreciation Week and saying Thank You with a chocolate cake with floral decoration.

This week is Teacher Appreciation Week in my son's school. 
It's time to stop and thank all those loving teachers who share knowledge with the little ones and work not just towards making them learn Math or Grammar but also work on their confidence and self-esteem.

When we moved, 3 months ago, the biggest change was for Li'll S. Changing school mid year is dreadful. Facing a classroom full of new faces, a new teacher is rather intimidating.
Thankfully, he was made welcome and soon settled in and has adjusted very well to all the changes thrown at him. 

chocolate cake with buttercream flowers

Everyday, when I pick S from school, he looks relaxed and is happy. As a mother, I couldn't ask for more.


chocolate cake with flowers
  So when Teachers Appreciation Week rolled by, I wanted to show my gratitude and what better than to share something sweet.

I made this cake for Teachers Lunch.
Its a 4 layer Chocolate cake with whipped cream filling.
The outer frosting and flower decoration is vanilla butter cream.
Sadly, the pictures don't do justice, I clicked them in a hurry and in bad yellow lighting.

For those who want a frosting recipe:
For this cake I used

4 sticks Salted Butter
1 Tbs Vanilla extract
2 Lbs. Powdered / confectioners Sugar
Milk ( I add by the teaspoon, about 3-4)  to get stiff consistency icing

Start by using room temperature butter.
Add the soft butter to the stand mixer.
Use the paddle attachment and start at a low speed and beat the butter till its soft, creamy and a shade lighter.
Add the vanilla and whip the butter some more.
Add the sugar, slowly and mix at slow speed to incorporate it well ( if the mixer is at high speed, the sugar will fly out  and you will have a white layer on the counter top)
Beat the mixture for at least 4-5 minutes to mix the butter and sugar well and make smooth icing.

To store, place the frosting in airtight containers and refrigerate.
I place the frosting in a container, then put saran wrap and then place the lid. That is optional.

buttercream floral decoration

I made this cupcake for my friend Prachi's son. She helped me carry the cake to school. It was a big cake and I needed help.


This cupcake is VERY special for me. See that orange rose? My little boy made it! He saw me making flowers and wanted to pitch in and help. I am so proud of him!

That's it from my end today. Have a great week ahead! 
Pin It

Sunday, March 05, 2017

Vegetable and Corn Chowder (IP/ Electric Pressure Cooker Recipe)

February was the 'Sugar Free' month in the AC@H household. It started off with high enthusiasm and I am happy I could stick to my plan. I admit, there were times I felt like I was caving in, but luckily, I managed to stick to my resolution. 
I also realized that my sugar craving is almost gone. The other day, the son and I made chocolates at home and I couldn't eat a single piece.
Earlier, I would make sheera or something sweet at the drop of a hat and the temptation to sit down to a piping hot bowl of sugary sweetness as soon as it is done was unbeatable, but not anymore! 

I am so glad I did this.

But I also realized that sometimes, sugar, in small portions is ok. For example, a bit of sugar in pohe and upma elevates the taste and balances the flavors. Ditto with some vegetables (for example, this simple Dudhi chi bhaji or cabbage (made the Maharashtrian way).The addition of sugar makes it taste so good! 
My morning cup of chai is what gets me going and adding a bit of jaggery to it makes me happy. It's the one concession I will make. It helped me stick to my resolution, I believe.  

So to sum it up, avoid sugar where you can, if possible, substitute with jaggery (at least it has iron content) and when absolutely neededuse sugar in small quantities. 

I have also been making good use of my EPC. With the temperatures still low and snow piled up till the end of February, it's was very cold.  Cold....cold evenings and piping hot soup make such a good combination.

When we first moved to Utah and stayed in the hotel for a while, eating out was our only option. I carried the EPC,but who wants to stock grain and oil and spices in a hotel room. The lingering smell is unavoidable and I was not going to have it sticking to us as well as all our belongings packed in suitcases. 
So on the bitter cold evenings, we would bundle ourselves in the car and drive to Zupas (which, by the by, was opposite the hotel, but we weren't inclined to trudge through the snow and wind) and fill up on heartwarming soups. 
I tried Vegetable Chowder for the first time and loved it. 
After that, I scoured the net for recipes and found so many that my recipe is a mish-mash of all I read. 
It is very simple and also a very forgiving recipe.
Approximate measurements are fine as long as you are careful and don't overdo anything.

Start with chopping vegetables, I used my chopper to get even pieces. 
I used  1 Red onion, 1 Russet potato, 1 (big) or 2 medium carrot, 1 zucchini and 1 - 1 1/2 cup corn kernels.
This made enough soup for one dinner (for 3) and M took some to work the next day and I slurped up a small bowl for my lunch the next day.

Start the Electric Pressure Cooker (Magic Chef/ Power pressure cooker / Instant Pot) and use the Sear/ Saute option.

Heat oil and add the chopped onion and saute till translucent. Add in all the chopped vegetables and mix for a minute or two. 

Add 2-3 tbsp. of All Purpose Flour ( this acts as a thickener)  and mix well to coat the vegetables.
Add salt, pepper and about 1- 1.5 tsp seasoning ( I used Italian seasoning, it's what I have on hand, you can use oregano / mixed herbs/ thyme) and added a dash of red pepper flakes. 
Add 2- 3 water / vegetable stock, stir well. 
Press the 'Cancel' button and seal the pressure cooker (whistle on 'seal' mode). 
Set it on 'Manual' mode for 2 minutes. QPR (Quick Pressure Release) once the timer beeps. Be careful when releasing the pressure, the steam can burn!


Add 1 full cup of milk ( I used whole milk, you can use half-n-half if you wish, to get a creamier version) and mix.
I noticed that my soup was a bit watery and so I used the immersion blender and blended it just a bit. The pureed vegetables gave the soup some body and it was perfect.

Turn on the saute mode again. and let the soup come to a gentle boil stirring almost all the time ( I was worried, because of the milk, it may not be needed). 
Grate and add Cheese ( I used Sharp Cheddar) and mix to incorporate.
Once the cheese is mixed in the soup switch off the EPC. 
Taste and adjust the seasonings.
Soup,one pot meal, chowder, vegetable chowder

Adding 1-2 cloves of minced Garlic (after sauteing onion) also tastes so good. I cannot recollect if I did or not, but as a side note, add in some. 
You can also add Yellow squash, celery, broccoli florets if you like. 
Adding Quinoa will amp up the protein. Just make sure you rinse it thoroughly to avoid the bitter taste.
Serve hot. Add a dash of red pepper flakes if you like. 
Adding some crushed tortilla chips as a garnish to vary the taste.

What's on my mind now.

I want to learn to enjoy salads and also to cut down on carbs. I also want to cut down on snacking. I love crunchy snacks and fall prey to them very easily. I did that just yesterday on my weekly visit to the Indian store. phrrrp! 
I guess, once I finish this lot, I will try and not buy any or at least but and v-e-r-y  s-l-o-w-l-y eat my way through the bag. 

The other thing is, to use my EPC more than I already am. I love using it for boiling eggs (makes the perfect boiled eggs and no babysitting), making chaivegetables, rice and khichadi, steaming ALu wadi, making yogurt and fermenting idli/dosa batter and very recently, dhokla and pullikachal ( coming up on the blog soon). 
I will update this place as I experiment and hope it helps fellow EPC users. 

Have a great week ahead, folks! 

Pin It

Thursday, February 02, 2017

Gulpolicha Ladoo (simplified and modified version of Gulpoli)

I love 'gulpoli'.To those who don't know about this, gulpoli is a thin, sweet stuffed flat bread. This is made in most Maharastrian homes during Sankranta. A Gulpoli has the goodness of whole wheat flour, the stuffing is made of roasted gram flour (besan), jaggery, sesame powder and scented with nutmeg powder and cardamom powder.
The making is tricky and it needs practice and patience. 
This flatbread, unlike a roti or even a puranpoli, isn't soft and pliable. It is a bit hard and is best enjoyed cold, with the customary smear of home made ghee. 

Around January, stores ( some typical stores that I remember are Vijay stores, Bedekar, Panshikar) would start stocking Tilgul ladoo, Til Wadi and Gulpoli. I would beg my mom to make or buy these. 
When time and schedule permitted ( as she was a working woman) she would make or buy. 

It's been years since I ate a gulpoli. I wasn't too confident about making them and not sure they would be a hit with M or li'll S, as much as they were with me. 
Many a times, I am the only one who ends up finishing things, and let me tell you, these sweet treats are not kind on the waist.
But this year, I could not get gulpoli off my mind. 
That combined with the fact that I could see them scattered across many pictures on a facebook group I am a part of, just was like adding fuel to fire! 
But making just 3-4 pieces of anything is, somehow, unsatisfying. But finishing up, just because no one else will, and with the  I-don't-like-to-trash-food mindset is even worse. 
So when I brooded over my dilemma a bit, the solution just popped up in my mind, something that would check off the boxes
  • limited in quantity
  • satisfy the craving
  • easy to make
So the evening before, I made 4 extra fulkas.
That's how it starts. 

I made a modified version of Gulpoli, using the same ingredients as required to make the stuffed version.
Only, my version uses premade rotis/ fulkas. I, made small ladoos ! 

These are every bite as good as the flatbread and can be made quickly and taste good and in this case, husband approved! They are not as labor intensive and do not fail (Those gulpolis have a habit of leaking hot molten stuffing onto the tava and burning and smelling bad and generally making one shed a tear and being disappointed, if you are not an expert).
Here is my simplified and modified version of the classic.

You need: 

4 Fulkas ( preferably extras from last night)
2 heaped Tbsp. Besan / gram flour
2 Tbsp. Oil
2-3 Tbsp Jaggery, crumbled
2 Tbsp. Sesame seeds, roasted to a golden brown and powdered (cool and powder)
Pinch Nutmeg powder
1 Cardamom, powdered
1 tsp Ghee ( or a bit more as needed)

To begin, crumble the roti /fulkas. You can do it by hand, but I prefer to run the quartered pieces of roti thru the chopper. It makes my work easy and super quick. Plus, the fulka/roti gets shredded really fine, just how I like it.

Sankranti special, Gulpoli, ladoo, poli ladoo
 In a non-stick pan, heat oil and add the besan to it. On a low flame, roast the besan to an aromatic, nutty golden brown, like you would for besan ladoo. Do not skimp on the oil, use the 2 tbsp. 

Leave the roasted besan aside, to cool.

While the besan cools, measure out the jaggery. I have used powdered jaggery. If you have the block, grate and use the required amount of jaggery. I have used 2 heaped Tbsp ( and I mean heaped! there was a small mound on top of the tbsp measure). Adjust the amount of sweetness. I don't like 'too sweet' but too little in this case will not taste good, remember, there is the besan as well as the sesame seed powder that will cut the sweetness as will the fulka/ roti. You don't want the ladoo to taste bland and pasty.

Roast, cool and powder the sesame seeds.
I added the cardamom seeds and the bit of nutmeg to the sesame seeds and powdered them together.

Gulpoli, Goolpoli, poli ladoo, chapati lodoo
Add the jaggery and the sesame seed powder to the roasted besan and mix. The oil in the besan should be enough to make a soft ball out of the mixture.

Now add the crumbled fulka /roti and ghee to the mixture and combine and mix very well.
If the mixture feels dry, add some more ghee. Make small balls of the mixture.

gulpoli, ladoo, tilgul poli ladoo

Gulpoli, Goolpoli, poli ladoo, chapati lodoo

You should be able to get about 6-8 ping pong ball sized ladoos.


This post was languishing in my drafts for some time. Finally, I sat down and typed it out, reminding myself that I should at least get this post done before 'rathasaptami' and also before I made a big change to my eating habits. Read on to know the change I am making.....


February is a milestone month. This year, I decided to change my habits a little. Over the past few years, I have neglected my health. I do not pay attention to my food habits. I usually make do with whatever-is-there for lunch and concentrate only on dinner, when the whole family sits together.
What happened was, I ended up eating junk or carbs on most days, cleaning up the fridge of leftovers, not realizing that my stomach was becoming the recycle bin , just because I could not bear to trash good food. 
A few changes I made by mid- January were, I cut down my sugar intake. This meant curbing my sweet tooth, but that was the small part.
The real battle was giving up sugar in my cup of tea. Now, I also love dunking biscuits in my chai, or munching on a piece of hot,lightly buttered toast. My mornings were made up of this happy routine. 
But this habit is very unhealthy and if I were to maintain a chart with calorie intake, this shows a good amount of calories exhausted at the very start of the day! 
So I tried my chai without sugar, it was VERY difficult. 
I admit it, I loathed it. I needed tea and drinking the 'sugar less' cup of tea was making me miserable. I know how childish it sounds, I mean, tons of people enjoy tea or coffee without sugar, but I could not do it. I longed for a cup of mildly sweet tea, regular tea. 
But I did not want sugar. See how my mind works? Finally, I decided upon a small compromise. I would add 1/2 tsp jaggery to my tea, it made me happy. That one small change helped me. 
Over the last couple of weeks since I have stopped consuming sugar (with the exception of that 1/2 tsp), I have lost the craving  of popping something in my mouth, for example, I would think nothing of smearing a slice of bread with some jam and eating it or scarfing down a fresh baked muffin. But now, I do not feel the urge to! Those who now me and my love for sweets, understand what a dramatic change this is for me. But sugar lurks in many corners of the pantry and so, I am going sugar fee, all February, high time I did it. When I saw Nupur (OHS) taking a step towards it, I was very eager to join in. Join me ( and many others) for this challenge ( it's never too late to make the change).
Putting it here, out in the open also adds accountability. 

This does not mean I will stop making anything sweet in my kitchen. I still have sugar stocked, I will use it to make some treat for my son, but the frequency will go down and my consumption will stop. My family will also get healthy habits with the occasional indulgence ( well deserved, in this case for a small boy).
If you'd like to join this challenge, leave a comment here or on the AC@H FaceBook page and start a healthy tomorrow! 
Pin It
Share

LinkWithin

Related Posts Plugin for WordPress, Blogger...
Page copy protected against web site content infringement by Copyscape